Ever opened the oven to find your brownies are half-baked on one side and burnt on the other? That's often a big hint that your oven element might be on the fritz. So, how do you know for sure if that's the problem? Let's break it down.
First things first, if you notice anything like uneven cooking, no heat, or maybe even a strange burnt smell coming from your oven, it's time to pay attention. These are classic signs that your heating element could be failing. You don't want to ignore these cues, as they can lead to bigger issues later on.
So, what do you do next? There's a simple way to test your oven element at home. Make sure your oven is off and cool, then take a close look at the element itself. If it's damaged, you'll often spot visible burns, blisters, or cracks. This visual check can save you a lot of time and guesswork.
- Spotting the Warning Signs
- Conducting a Quick Test
- Replacing the Element
- When to Call a Professional
Spotting the Warning Signs
So, you suspect your oven element is acting up. But how can you tell for sure? A few tell-tale signs can save you from frustration and wasted meals.
Uneven Cooking
The most common sign is food not cooking evenly. If one side of your pie is golden brown while the other is pale and doughy, it's time to raise an eyebrow. A broken oven element can mess with heat distribution, leading to these frustrating results.
No Heat at All
Another major red flag is a completely cold oven. This can often mean the baking element is completely shot. Before assuming it's dead, though, make sure you haven't accidentally pressed a wrong button or blown a fuse.
"A broken heating element is often the reason ovens fail, especially if you notice a lack of heat during preheat cycles," says Lisa Goodwin, a seasoned appliance technician.
Strange Odors
If your oven emits a distinct, burnt smell that wasn't there before, an oven element might be failing. This smell could indicate that the element is burning out, especially if you catch it early.
Visual Inspection
For the braver souls, a quick look can reveal a lot. Turn off the power, and once your oven is cool, open it up and check the element for any obvious burns, blisters, or cracks. Discovering visible damage is like hitting the jackpot for diagnostics.
If spotting these signs makes you feel like a detective in your kitchen, you're not alone. Many of us become sleuths to keep our culinary companions running smoothly.
| Sign | Possible Issue |
|---|---|
| Uneven Cooking | Heat distribution issue |
| No Heat | Dead baking element |
| Strange Odors | Element burning out |
Conducting a Quick Test
Before you dive into **oven repair**, it's crucial to know if your oven's heating element is indeed the culprit. Conducting a quick test can save you money and time. Here’s how you can do it without calling in the pros.
Tools You'll Need
All you need for this quick test is a flashlight and, sometimes, a multimeter if you want to get all techy with it.
Visual Inspection
Start by making sure the oven is completely cool to avoid any burns. Open the oven door and grab a flashlight. Take a close look at the **oven element**. You're looking for obvious signs of damage like cracks, breaks, or blisters along the element's surface. If you spot any of these, it’s likely your element needs replacing.
Continuity Test
If you're up for it, a multimeter can give a more definitive answer. Here's a basic rundown:
- Unplug the oven or switch off the circuit breaker for safety.
- Remove the heating element. This usually involves unscrewing it from the oven’s back wall.
- Set your multimeter to the ohms setting.
- Touch the multimeter probes to each end of the element's terminals.
- Check the reading. A working element typically shows a reading between 10 and 100 ohms. A zero or infinity reading means you need a new element.
Remember, if the DIY route isn't your cup of tea or if you're getting no reading at all, reaching out to a professional might be your safest bet. Don't risk frying your fingertips over some **oven troubles**.
Here's a quick comparison of common signs of a broken element versus normal behavior to help you:
| Sign | Possible Issue |
|---|---|
| Uneven cooking | Possibly broken element |
| Oven light stays on/off erratically | Not necessarily a broken element |
| Visible damage on element | Definitely requires replacement |

Replacing the Element
If your oven element seems broken, don't sweat it; replacing it is often easier than you might think. With a little patience and some basic tools, you'll have it swapped out in no time.
Gather Your Tools First
Before diving in, make sure you've got everything you need: a screwdriver, pliers, and a new oven element that matches your model. Most appliance stores have these elements in stock, just remember to take your oven model number with you.
Safety First
Okay, safety check time! First, ensure your oven is unplugged. If you can't access the plug, turn off the power at your home's breaker panel. This isn't just a precaution; it’s crucial to avoid any electrical hazards.
Step-by-Step Replacement Guide
- Remove the Old Element: Open your oven and locate the element. It’s often at the bottom for bake elements. Unscrew the screws or clips that hold it in place and gently pull it out. Be careful with the wires attached; you’ll need to reconnect them to the new element.
- Disconnect the Wires: Use pliers to disconnect the wires from the old element. Remember, these can be fragile, so handle them with care to avoid any damage.
- Connect the New Element: Attach the wires to the new oven element. Make sure the connections are snug and secure. Loose connections can cause the element not to work properly.
- Install the New Element: Carefully position the new element and secure it with the screws or clips you removed earlier. Double-check to ensure everything is lined up properly.
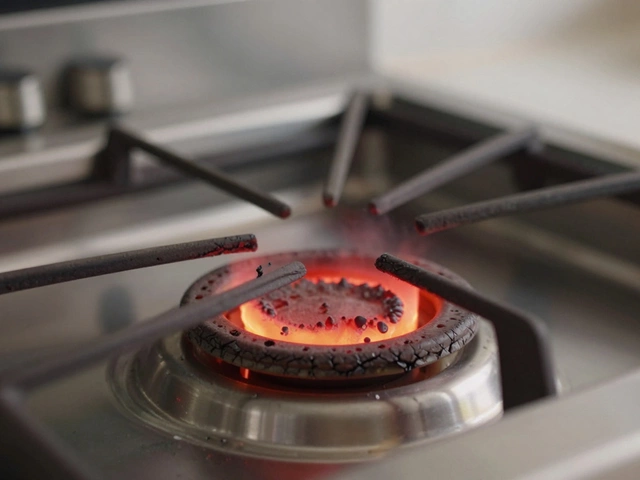
- Power Up and Test: Once everything is secured, power up your oven again. Turn it on to test and see if the new element heats up. If it glows red, you’ve done it right!
Replacing a broken oven element doesn't require a degree in rocket science, just some careful attention and a bit of time. But, if at any point you feel unsure about what you're doing, don't hesitate to call in a professional to help out. Sometimes paying for peace of mind is worth it!
When to Call a Professional
Sometimes, despite your best troubleshooting efforts, you just can't get that oven to behave. That's when bringing in the experts is a smart move. So, when should you call a professional to take a look at your broken oven? Here are some scenarios that might require a bit more than DIY skills:
When DIY Isn't Safe
If you're uncomfortable handling electrical components, it's better to err on the side of caution. Messing around with an oven's wiring can be dangerous if you're not experienced. Every year, thousands of home accidents involve electrical repairs. Don't make yourself a part of that statistic.
When the Problem Persists
You've tried all the basics, but nothing's fixed that broken oven element. Whether it's still cooking unevenly or not heating at all, a stubborn problem that's not responding to standard tests means it's time for a pro. They can uncover hidden issues that might be beyond a simple element replacement.
If It's a Complex Repair
Sometimes older or high-end ovens come with more complex parts and systems. If your oven's repair manual looks more like a novel, it's time to consider professional help. Complexity increases the risk of further damaging your appliance if you're not familiar with the model.
| Reason | Pro Expertise Needed |
|---|---|
| Electrical Safety | Handling wires could expose you to electric shock risks. |
| Persistent Issues | Problems continue even after obvious tests and checks. |
At the end of the day, bringing in a professional can save you a lot of time, stress, and potentially money, in the long run. It's an investment in keeping your kitchen running smoothly and safely.