Your microwave suddenly goes dark, and everything you’re trying—the door, the buttons, the plug—nothing works? The fuse might be the culprit. You don’t need to guess or toss the whole thing out yet (trust me, I almost did that after Luna the cat knocked her treats onto the microwave and it quit on me!).
The fuse is a tiny part but makes a big difference. It’s like the safety gate of your microwave—if something goes wrong, it shuts things down to prevent bigger problems. A blown fuse can leave your appliance totally unresponsive, but knowing how to spot this issue saves time, money, and a lot of frustration. Most of us have never even seen a microwave fuse, yet checking it is easier than you’d expect.
If you figure out your fuse is fried, you can usually swap it out for just a few bucks and skip a visit from Mr. Fix-It. Before you start, make sure to unplug the microwave—working on a plugged-in appliance is never worth the risk. Ready to figure out what’s really going on with your microwave? Let’s break down the steps and flag the easy warning signs, so you don’t end up eating cold soup or microwaving your lunch in the oven for the next week.
- What Actually Happens When a Microwave Fuse Blows
- Common Signs: Is Your Fuse Really the Problem?
- How to Locate and Check the Fuse Safely
- Replacing a Blown Fuse: Simple Steps and Safety Tips
- When You Should Skip DIY and Call a Pro
What Actually Happens When a Microwave Fuse Blows
So here’s the deal: your microwave fuse is basically the gatekeeper for your appliance’s safety. When something weird happens inside the microwave—like a power surge, short circuit, or just plain overheating—the fuse snaps and cuts off all electrical flow. It’s one of those "kill switches" built to stop things from getting dangerous or causing a kitchen fire.
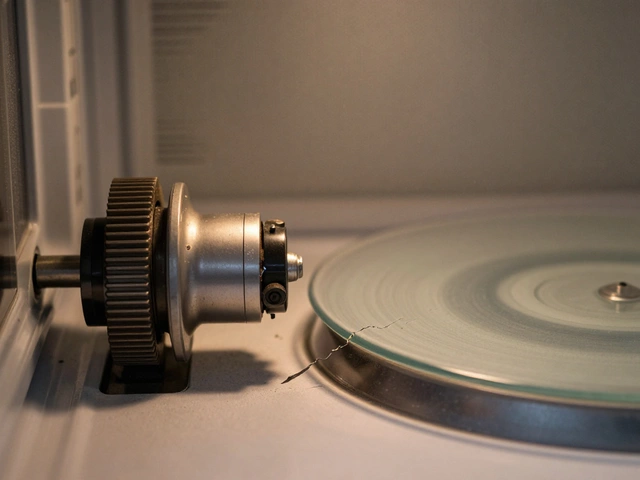
In almost every microwave, you’ll find at least one ceramic or glass fuse inside. It looks like a tiny capsule with metal ends. If you accidentally run your microwave empty, a surge hits your kitchen (like during a thunderstorm), or a component inside goes rogue, that fuse is going to "blow." That means a thin piece of wire inside it melts or breaks, so electricity can’t get through. Once that wire is broken, absolutely nothing in the microwave will work—not the clock, not the light, not the turntable.
Here’s a quick snapshot of what usually triggers a blown fuse in microwaves:
- Power surges from lightning or local outages
- Running the microwave empty (yep, just air cooks nothing but damages your appliance)
- Something inside shorting out—like a bad door latch or switch
- Overusing the microwave and letting it overheat
- Dropping heavy stuff on top (Charlie once jumped up, and the drop made mine hiccup!)
Studies from appliance repair pros show that blown fuses are responsible for nearly 20% of non-start issues reported for microwaves. That’s a pretty solid chunk, considering all the parts that could go wrong. The fuse is designed to fail for your safety, so replacing it (with the exact same type and specs) is key before you plug everything back in.
If you open up your microwave and spot a fused wire that’s clearly blackened or snapped—or the glass inside is cloudy or burnt—the fuse has done its job. But keep in mind, a blown fuse can point to a bigger issue inside, too. So while swapping the fuse is step one, it’s smart to check if your microwave has some underlying problem that needs a closer look.
Common Signs: Is Your Fuse Really the Problem?
Before you go searching for your microwave fuse, pay attention to a few classic signs. These symptoms usually mean the fuse might be blown, not just that your microwave needs a reset or is mad about leftovers again.
- Completely Dead Microwave: No lights, no beeps, no fan, not even a hum. If plugging it into another outlet doesn't help, think fuse.
- Everything Else in the Kitchen Works: Other appliances on the same outlet or circuit are fine? That almost always narrows it down to your microwave fuse.
- Buttons and Clock Are Out: You press buttons for popcorn, nothing lights up. The digital clock is blank. If the fuse is blown, all the electrics are offline.
- No Buzz or Internal Light: Usually when you open the door, a light goes on or the fan clicks off. Silence and darkness hint at a fuse issue.
One thing to call out—sometimes people mistake a tripped circuit breaker for a blown blown fuse. Before you go any further, check your breaker box. If the breaker flipped, your microwave might be fine.
| Sign | Possible Cause |
|---|---|
| Microwave completely dead | Blown fuse or power issue |
| Buttons and display are blank | Blown fuse |
| Other kitchen gadgets work | Specific to the microwave |
| Breaker not tripped | Fuse more likely to blame |
Don’t forget oddball cases—a stuck door latch or a fried control board can also kill power, but a blown microwave fuse is way more common. If your microwave makes a popping sound before it died, that’s another big clue. Kind of like the sound Charlie makes when he hops off the couch—quick and sharp. That pop is the fuse doing its job and saving the rest of the microwave from bigger damage.
If these things sound like what’s happening in your kitchen, your fuse is likely the problem. Ready to get hands-on and check? Let’s roll up our sleeves and go to the next step.
How to Locate and Check the Fuse Safely
First up, safety comes before everything else. Unplug your microwave from the wall. Don’t skip this step. Even when it’s off, the microwave can pack a punch of electricity inside, so play it safe.
Most microwaves have their microwave fuse hidden behind the outer casing or just behind the front panel. It’s usually a small, cylindrical, glass or ceramic tube. On the top or back edge of your microwave, look for a few screws—grab a screwdriver that fits and take your time removing them. Remember which screws came from where and keep furry helpers like Charlie or Luna away from the work area (I learned this the hard way!).
Once you’re in, spot the fuse: it’s often near where the power cord connects inside or close to the control panel. If there’s more than one, take a picture with your phone before pulling anything out. That way, you won’t forget how it sits.
- Unplug: Always confirm, no power to the unit.
- Access: Remove the microwave’s outer cover carefully; some edges are sharp.
- Spot the fuse: Look for a tube-shaped part—normally about 1–2 inches long.
- Remove gently: Use a flat screwdriver or your fingers. Don’t force it.
To check if it's a blown fuse, look for a blackened spot or a broken wire inside the glass. Not seeing any damage? You’ll need a multimeter—a cheap one from the hardware store works fine. Set it to test continuity, touch both ends to the fuse tips. If it beeps (or the display changes), your fuse is likely okay. No sound? That means it’s shot and needs swapping.
Microwave fuses are appliance repair basics—cheap, easy to swap, but always make sure you buy a replacement with the exact same rating. Here’s what you might see on a typical fuse:
| Fuse Type | Amperage (A) | Voltage (V) |
|---|---|---|
| Glass | 15 | 250 |
| Ceramic | 20 | 250 |
Put it back the same way, secure the cover, and plug your microwave in. If the issue was just a blown fuse, you’ll hear the usual beep when pressing buttons. Still nothing? There’s probably a deeper problem hiding inside—don’t poke farther unless you know your stuff.
Replacing a Blown Fuse: Simple Steps and Safety Tips
So, you’ve figured out your microwave fuse has bit the dust. No sweat—replacing it is actually one of the easier microwave repair tasks, as long as you play it safe. Here’s how to get it done without zapping yourself or wrecking your appliance.
First rule: Unplug your microwave completely. Never trust just turning it off. There can still be a nasty jolt hiding inside (microwaves have high-voltage capacitors that sometimes store electricity).
- Remove the outer cover—You’ll need a screwdriver, usually a Phillips head. Once the screws are out, carefully lift off the microwave’s outer shell. If you’re dealing with a countertop model, this is usually simple; for built-ins, it might be trickier.
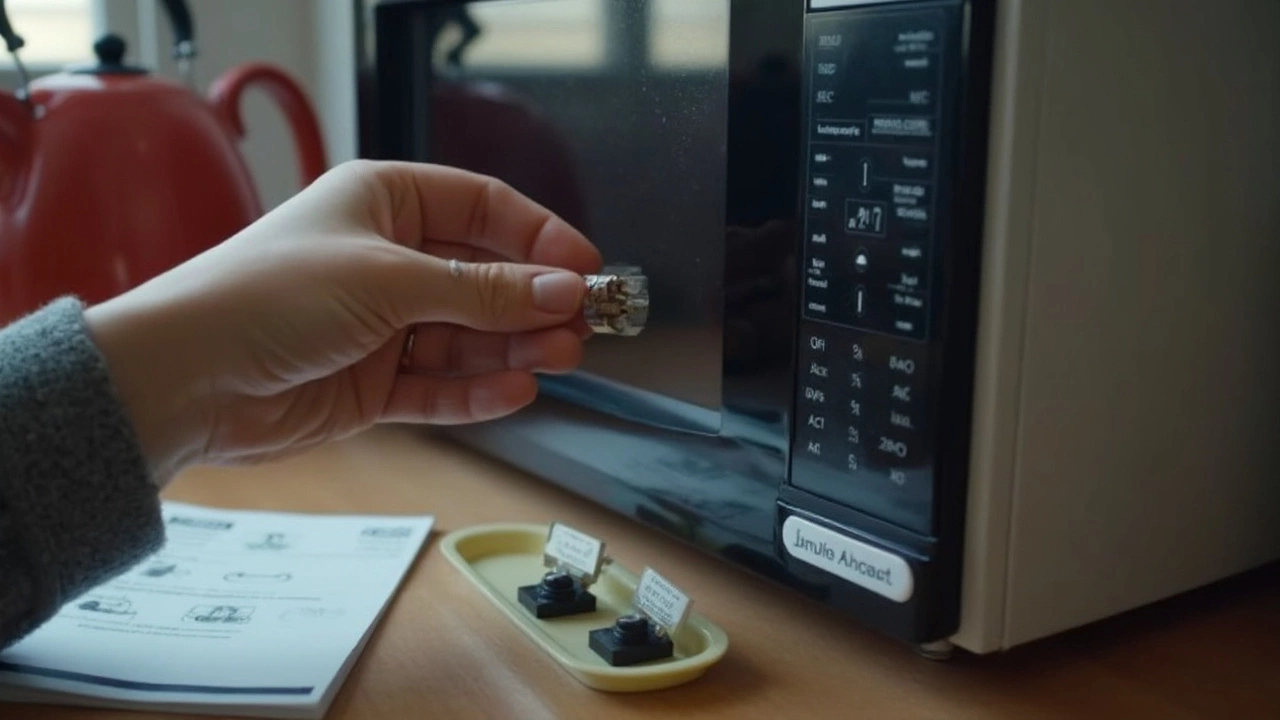
- Find the fuse—The blown fuse is often in a small plastic holder near where the power cord enters. It looks like a little cylinder (about the size of a piece of chalk). You might see more than one fuse, so pay attention to the type you pulled out.
- Carefully remove the fuse—Use insulated tweezers if you have them, or just gently pop it out with your fingers. Double check it—if the metal inside is broken or you see a dark spot, yep, it’s blown.
- Match and replace—Take the old fuse to a hardware store, or check the rating on the fuse itself (something like 20A 250V). Grab an exact replacement—don’t be tempted to stick in ‘almost right’. Pop the new one in the same spot.
- Put the cover back on and screw it down. Plug the microwave back in and see if it springs to life.
Extra safety tip: Never mess with the microwave fuse if you’re seeing burn marks inside, you smell plastic, or you’re missing the right part. That’s a good time to call someone who really knows their stuff.
Quick look at common fuses you might encounter:
| Fuse Type | Rating Example | Where Seen Most |
|---|---|---|
| Ceramic Fuse | 20A 250V | Most home microwaves |
| Glass Fuse | 15A 250V | Older or smaller models |
Finishing the job right means your microwave repair is safer, faster, and less likely to cost you a finger (or a weird call to the fire department). If the new fuse pops instantly, there’s probably a bigger issue. Best to unplug it and find a pro at that point. Otherwise, high five—you just fixed your own microwave.

When You Should Skip DIY and Call a Pro
Not every microwave repair is a quick fix you can handle at home. There are some problems you should never mess with unless you want to risk a shock—or even worse, start a fire in your kitchen. If your microwave’s fuse keeps blowing again and again, or if you notice burns, a weird smell, or melted plastic around the inside or back panel, it’s time to step back. Multiple blown fuses mean there’s a deeper issue, not just a bad fuse.
Here are the moments when you should definitely put down the screwdriver and call a pro:
- Microwave won’t power on even with a new fuse. This points to bigger electrical or circuit board failings.
- Visible damage or burning inside the microwave. That’s a big red flag about overheating or faulty wiring.
- Strange odors, sparking, or smoke. These could signal short circuits or bigger electrical hazards.
- Unusual noises (buzzing, clicking, or humming) after a fuse replacement. Sounds hint at stray electrical currents or motor issues.
- You’re uncomfortable handling or testing electrical parts. Microwaves store high voltage even after unplugging—the capacitor inside can give you a shock long after the microwave's off.
Microwaves aren't like toasters or blenders. That high-voltage capacitor inside? It can retain a 4,000-volt charge for hours after unplugging. That’s enough to put even brave DIYers in the ER. Don’t mess around if you don’t know what you’re doing.
If you’re still on the fence, here’s a little data from appliance repair services:
| Common Microwave Repair Call Reasons | % of Service Visits |
|---|---|
| Repeated blown fuse | 36% |
| No power after DIY fix | 27% |
| Burnt/melted components inside | 18% |
| Weird noises and smoke | 12% |
| Other/Unknown | 7% |
So, if any of the warning signs above show up, reach for the phone, not the toolbox. Safe beats sorry—your kitchen and your fingers will thank you.