Oven Repair Difficulty Checker
Key Takeaways
- Most oven hiccups are caused by a few simple parts - heating element, thermostat, door seal or control board.
- Basic safety steps (unplug, turn off gas) let you test or replace many components yourself.
- DIY fixes usually cost $20‑$150; calling a pro adds labour but protects warranty.
- When you hear strange smells, uneven heating or error codes, follow a quick checklist before deciding.
- Regular cleaning and a yearly visual inspection keep "are ovens easy to fix?" in the "yes" column.
When your oven is a kitchen appliance that bakes, roasts, and broils food using controlled heat starts acting up, the first question is usually, "Is this something I can handle myself?" The short answer: yes, for the most common glitches. The longer answer walks you through the parts that fail most often, the tools you’ll need, safety tips, and when it’s smarter to call a certified technician.
Understanding the Main Parts
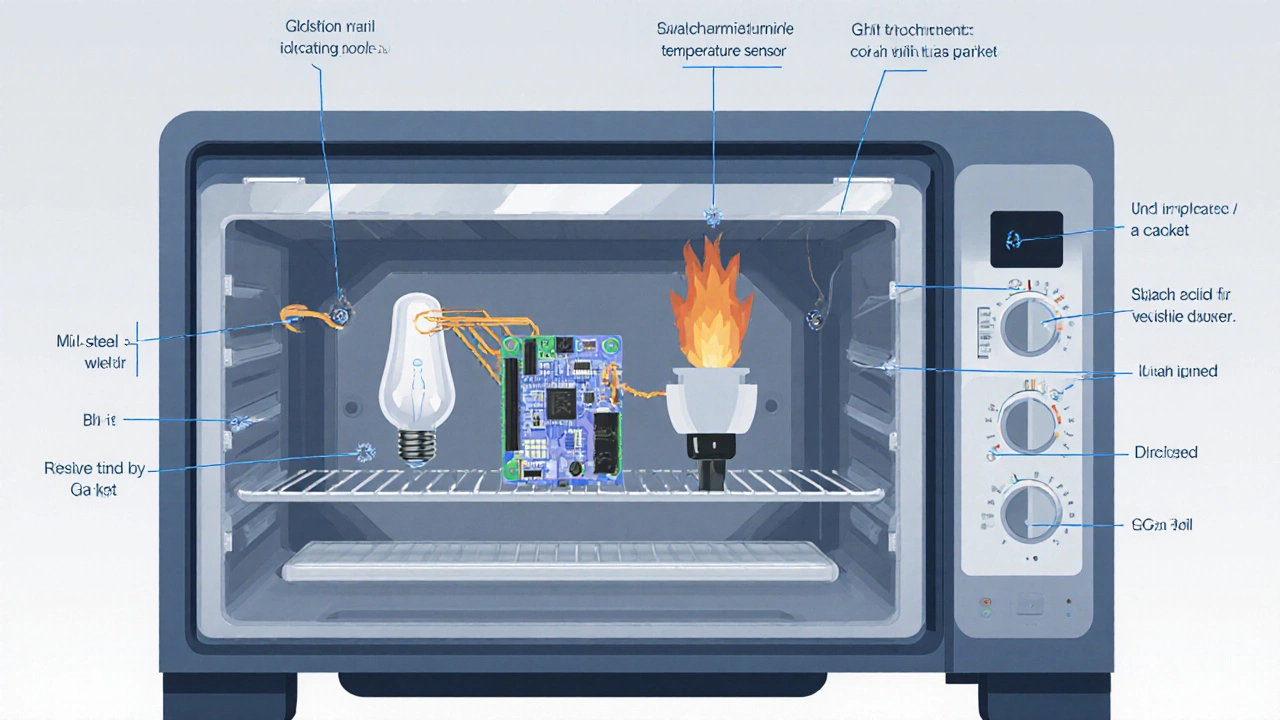
Knowing the moving parts makes troubleshooting feel less like guesswork. Below are the six components that cause the bulk of oven failures. Each is introduced once with microdata - that’s the markup search engines love.
- Heating Element a metal coil that glows red to generate heat in electric ovens
- Thermostat a temperature‑sensing switch that tells the oven when to turn the heat on or off
- Temperature Sensor often a thermistor that feeds temperature data to the control board
- Control Board the electronic brain that coordinates heating cycles, timers, and digital displays
- Door Seal a rubber gasket that keeps heat inside the cooking cavity
- Gas Igniter the spark‑producing component in gas ovens that lights the burner
Most Common Oven Problems
These issues show up in about 80% of service calls, according to New Zealand’s home‑appliance repair data from 2023‑24.
- No heat - could be a burnt heating element, a faulty thermostat, or a tripped safety fuse.
- Uneven baking - often a failing door seal or a mis‑calibrated temperature sensor.
- Erratic temperature - usually the thermostat or the control board sending wrong signals.
- Strange smells or clicking - think burnt element residue or a gas igniter that won’t spark.
- Display error codes - most digital panels show a code that points straight to the faulty component.
Simple DIY Checks Before You Unscrew Anything
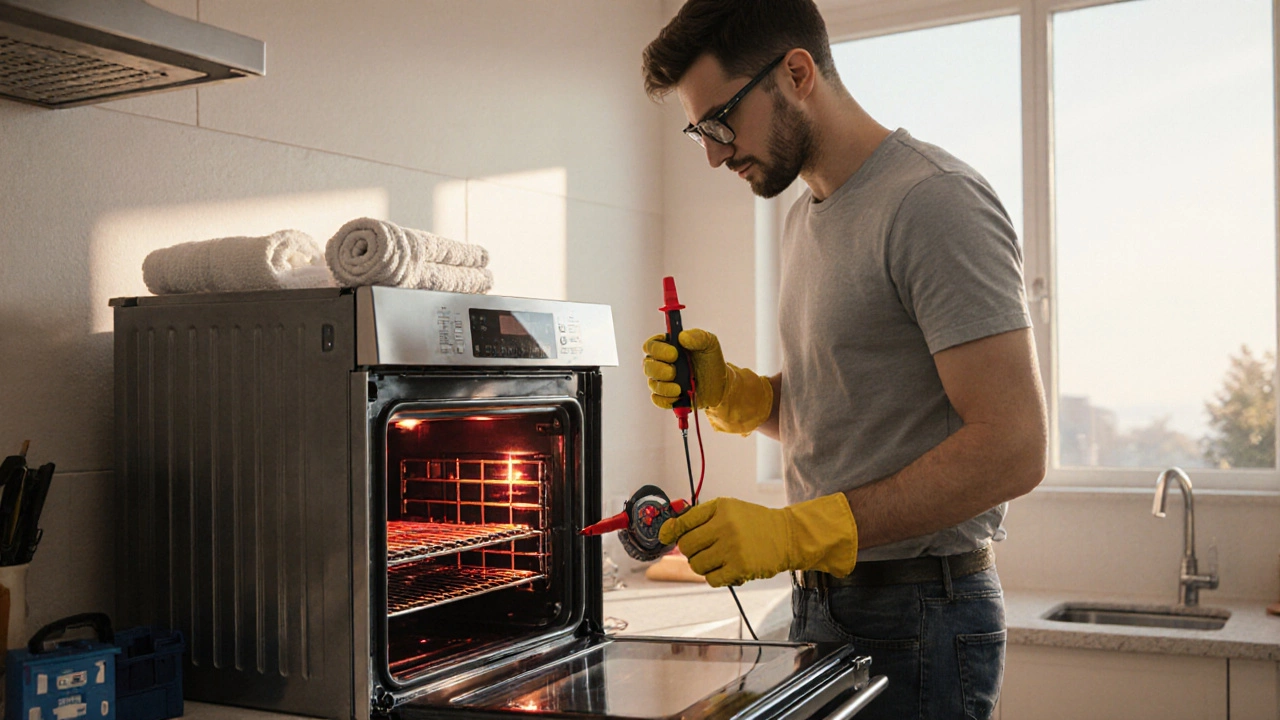
Grab a screwdriver, a multimeter (under $30) and follow these three quick steps. You’ll save a lot of money if the problem is something you can fix in under an hour.
- Power check: Unplug the oven or shut off the circuit breaker. For gas models, turn the gas valve to "off".
- Visual inspection: Look for broken wires, blown fuses, or obvious scorch marks on the heating element.
- Continuity test: Set the multimeter to ohms (Ω). Touch the probes to the element’s terminals - a reading of infinite ohms means the element is open and needs replacement.
If the element tests fine, move on to the thermostat. Remove the back panel, locate the thermostat (a bulb‑shaped device near the oven cavity) and repeat the continuity test. Most thermostats read about 100Ω at room temperature; a zero or infinite reading signals a bad part.
When to Replace Parts Yourself
All of the components listed above are designed for homeowner replacement. Here’s a quick cost guide (NZD) and a thumb‑rule for deciding if DIY is worth it.
| Part | Average Price | Difficulty (1‑easy, 5‑hard) |
|---|---|---|
| Heating Element | $45‑$80 | 2 |
| Thermostat | $30‑$55 | 2 |
| Temperature Sensor | $20‑$40 | 1 |
| Control Board | $120‑$250 | 4 |
| Door Seal (gasket) | $15‑$35 | 1 |
| Gas Igniter | $25‑$50 | 3 |
If the part you need scores a 1‑or‑2 on the difficulty scale and you have basic tools, go for it. Anything 3‑plus - especially the control board or gas igniter - deserves a professional’s touch unless you’re comfortable working with high‑voltage or gas components.
Safety First: The Golden Rules
- Always disconnect power before opening panels. For gas ovens, wait a minute after turning the knob off to let any residual gas clear.
- Wear gloves and safety glasses when handling broken glass or scorched wires.
- Check for gas leaks with a soap‑water solution after any work on the igniter or gas valve - bubbles mean a leak.
- Know your warranty. Some manufacturers void the warranty if you replace the control board yourself.

DIY vs Professional: How to Decide
Here’s a quick decision tree you can run in your head:
- If the oven won’t turn on at all, start with the power cord and circuit breaker - inexpensive fixes you can do in 10minutes.
- If the error code points to a heating element or thermostat, check continuity. Replace if faulty; cost is under $80 total.
- If the control board flashes an error or the oven displays random codes, call a pro. Replacements often exceed $200 plus labor.
- If you smell gas, hear clicks, or notice a yellow flame, shut off the gas supply and call a licensed gas‑appliance technician immediately.
In most Auckland homes, a qualified technician charges $80‑$120 per hour, plus parts. For a simple element swap, you’ll pay $150‑$200 total - still cheaper than a full service if you could have done it yourself.
Full Troubleshooting Checklist
- Unplug or switch off breaker.
- Inspect door seal for cracks or tears.
- Visual check of heating element for discoloration.
- Test element and thermostat with a multimeter.
- Clear any debris from the oven vent (poor airflow can cause overheating).
- Read the display code; match it to the user manual.
- For gas ovens, ensure igniter glows bright orange when you turn the knob.
- Re‑assemble, restore power, and run a quick bake test (180°C for 15minutes).
Follow the list step‑by‑step and you’ll know exactly where the problem lies before you even pick up the phone.
Frequently Asked Questions
Can I replace an oven heating element myself?
Yes. After disconnecting power, remove the rear panel, unscrew the old element, and slide the new one into the same slots. Most elements hook onto two terminals - just tighten the screws and you’re done. A $20‑$30 multimeter helps confirm the old part was indeed faulty.
Why does my oven heat unevenly?
Uneven heat usually means the door seal isn’t sealing properly or the temperature sensor is off‑center. Check the gasket for gaps; replace it if you see any cracks. If the sensor looks bent, straighten it or swap it out - it’s a cheap part and fixes most hot‑spot issues.
What does an error code "E1" mean on a digital oven?
On most brands, E1 flags a problem with the temperature sensor or the control board communication. First, disconnect power for a minute to reset the board. If the code returns, test the sensor’s resistance - it should read about 10kΩ at room temperature. Replace the sensor if it’s out of range; if it’s fine, the board likely needs professional replacement.
Is it safe to clean the heating element with a damp cloth?
Only when the oven is completely unplugged and the element is cool. Use a soft, non‑abrasive cloth; never spray water directly onto the coil. Moisture can create short circuits when you power the oven back up.
How often should I replace the oven door seal?
Every 5‑7 years, or sooner if you notice heat escaping, the gasket turning brittle, or a whistling sound while baking. Replacing it costs about $20‑$35 and does not require a technician.
Bottom line: oven repair is often a DIY win for the average homeowner. With a few basic tools, a quick safety checklist, and the right part on hand, you can solve most of the complaints that make people wonder, "Are ovens easy to fix?" If you hit a roadblock, the cost of a professional call is still far less than buying a brand‑new oven.