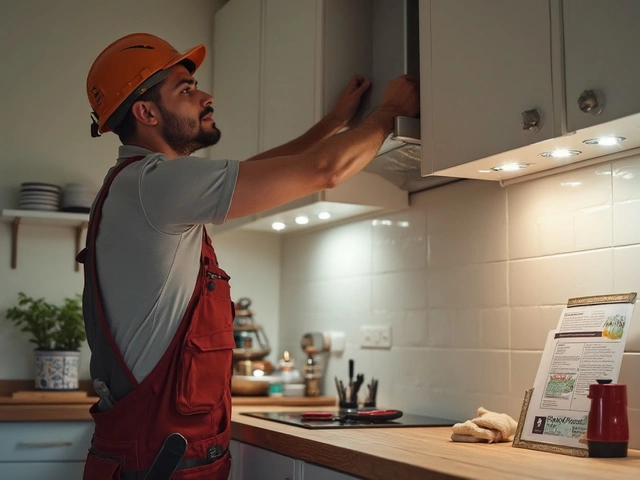
Extractor fans get a tough job—chucking out steam, smells, and grease from your kitchen or bathroom day in and day out. At some point, they start making weird noises or just stop working. Before you groan at the thought of buying a whole new unit, know this: most extractor fans can be fixed with a bit of know-how and some pretty basic tools.
People throw away fans for simple problems like a blocked filter, a busted switch, or even just a load of gunk stuck in the blades. It’s easy to assume these things are too complicated to deal with, but honestly, you don’t have to be an electrician to handle a lot of the issues. Sometimes, a deep clean or swapping a cheap part is all it takes to get things running smoothly.
If your fan isn’t turning on at all, don't panic yet. Check the power first—sometimes it's just a tripped breaker or a loose connection. Hear a grinding noise? Dust and grease build-up is usually the villain. The trick is knowing what you’re looking for and what quick fixes you can do yourself without risking your fingers or your wiring.
- Why Extractor Fans Fail
- Do You Really Need a New One?
- Common DIY Repairs That Actually Work
- Tools You’ll Need and Basic Safety
- When to Call a Professional
- Simple Tips to Keep Your Fan Running Longer
Why Extractor Fans Fail
Extractor fans aren’t built to last forever. They run into problems for a few main reasons, and understanding these helps when it comes to extractor fan repair or troubleshooting at home. The enemies? Dust, grease, humidity, dodgy wiring, and cheap moving parts.
One of the most common issues is buildup. Kitchen extractors suck in grease and steam, and bathroom fans deal with loads of moisture and dust. Over time, blades and filters clog up, and the motor has to work harder, which shortens its life.
Another regular culprit is electrical trouble. Most fans rely on simple wiring and a switch, but these connections can loosen or corrode, especially in damp places. You might even spot scorch marks near the wires or a burning smell—that’s a sign to turn it off right away!
Cheap parts are a problem too. Some manufacturers cut corners, using weaker motors or flimsy bearings. If your fan sounds like it’s grinding or rattling, it might be the motor bearings giving up, not just a clog.
Let’s look at the most common troublemakers for extractor fan repair in the table below. You’ll see what causes the problem and what you might notice:
| Problem | Common Cause | What You Notice |
|---|---|---|
| Fan doesn't turn on | Power supply, wiring, dead motor | No noise, no spinning |
| Loud or grinding noise | Dirt, worn bearings, loose blade | Rattling, squeaking, humming |
| Weak airflow | Blocked filter/blades, clogged vent | Slow or barely any suction |
| Bad smells | Dust, trapped grease, old filters | Odors even with fan on |
If you stay on top of cleaning and check connections every so often, you’ll catch a lot of these problems before they kill the fan. Regular care is key, especially in places that get steamy, greasy, or dusty.
Do You Really Need a New One?
Before rushing to buy a brand new extractor fan, check if yours is really toast. Most fans won’t die overnight—usually, they give plenty of warning signs first. Sometimes the problem is smaller (and cheaper) than it looks.
Look for obvious clues. No power? Try the wall switch and check your breaker box. Fan spinning slow? That could just be a dirty or clogged filter. Noisy as a jet engine? It’s almost always built-up grime or a loose screw rattling around. These are usually quick fixes that don’t require a new fan at all.
Manufacturers design a lot of kitchen fan repair and bathroom fan fix jobs to be simple, like swapping out a dead pull cord or replacing a blown fuse. Here’s how to figure out if you’re better off repairing instead of replacing:
- Check the age: Most extractor fans last 7–10 years. If yours is under 5 years old, fixing it will probably make sense.
- Assess the cost: If a replacement part (like a new motor or switch) is less than half the price of a new fan, repair usually wins.
- Look for spare parts: Some older or basic fans use parts that cost next to nothing online.
- Test performance: If airflow hasn’t dropped off and the noise problem started suddenly, repair is likely easy.
If your extractor fan repair ends up costing close to what a new unit costs, then replacement can be better—especially if you want a quieter or more energy-efficient upgrade. Here’s a quick look at how typical repair vs replacement costs stack up:
| Repair Option | Average Cost (GBP) |
|---|---|
| Clean & Lubricate | £0–£20 |
| Replace Switch or Cord | £10–£30 |
| New Motor | £30–£70 |
| Brand New Extractor Fan | £60–£200 |
Unless yours is ancient or seriously damaged (like from a short circuit or smoke), try some basic troubleshooting before shelling out for a completely new fan. Plenty of extractor fans just need a little attention—not a full replacement.
Common DIY Repairs That Actually Work
Not every extractor fan disaster calls for a pro. Plenty of extractor fan repair tasks are totally doable with some patience and the right steps. Honestly, you don’t even need fancy tech skills—just some basic tools and a willingness to get a bit messy.
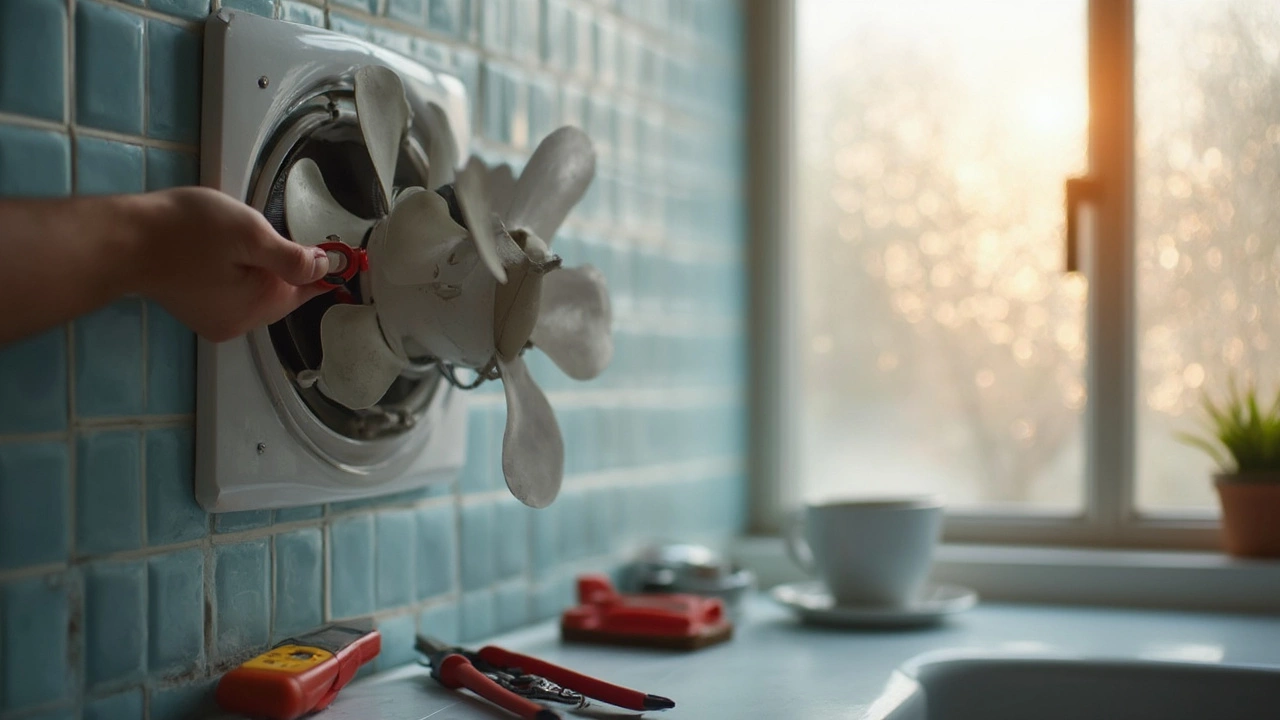
1. Cleaning the Blades and Grilles
The number one fix? Clean the thing. Grease and dust slow down your fan, sometimes making it noisy or useless. Unscrew the cover, take out the removable parts, and soak them in warm, soapy water. Wipe down the blades with a damp cloth. Most people forget this, but it helps with both kitchen fan repair and bathroom fan problems.
- Turn off the power (don’t skip this—seriously).
- Remove the outer cover, usually with a screwdriver.
- Soak cover and filters in hot soapy water or scrub with a brush if they're bad.
- Wipe fan blades and inside housing with damp cloth and a bit of mild detergent.
- Let everything dry fully before putting it back together.
2. Resetting or Replacing the Switch
Sometimes the fan works fine, but the switch is busted. If your fan won’t turn on but you’re sure it’s got power, try popping in a new wall switch or checking any pull-cord mechanism. This quick fix covers loads of extractor fan troubleshooting calls.
3. Swapping the Motor or Capacitor
If your fan hums but doesn’t spin, you might have a dodgy motor or a blown capacitor. Replacements are sold online and usually come with step-by-step guides. Most fan motors are attached with a couple of screws and a plug-in wire set. Capacitors look like little barrels or buttons and snap or screw into place. Always double-check voltage and size before ordering a replacement.
| DIY Repair | Success Rate | Approx. Cost |
|---|---|---|
| Cleaning and Maintenance | 85% | Free to £10 (cleaners, brush) |
| Switch Replacement | 75% | £5 - £20 |
| Motor or Capacitor Swap | 60% | £15 - £40 |
4. Replacing the Fan Blade
Bent, cracked, or filthy blades are a pain. Luckily, you can usually get replacement blades. Turn off the power, unscrew the broken part, and put the new blade on. If you get rattling or vibrating noises after, check that the blade sits snugly on its spindle and nothing is wobbling. A neat trick: spin it by hand before powering up.
5. Tightening Up Loose Parts
Lots of noise and bad smells come from loose screws, unbalanced blades, or a wonky mounting bracket. Tighten every screw you see. If the cover doesn’t snap flush or the fan wobbles, fix it before running the fan again. That alone solves a ton of problems with both bathroom fan fix and kitchen models.
Always remember to cut the power at the breaker before poking around. These simple fixes make a big difference and can save you from buying a whole new unit. Sometimes all an extractor fan needs is a bit of attention—and a lot less money than you’d think.
Tools You’ll Need and Basic Safety
If you’re planning to tackle extractor fan repair yourself, you don’t need a toolbox straight out of a pro’s van. Most fixes need only a few common items and a bit of care to avoid accidents. Let’s go over what you need and how to stay safe while poking around your fan.
- Screwdrivers: Both Phillips and flat-head types. Most extractor fans are locked in with just a couple of screws.
- Vacuum cleaner: To suck up dust and debris from fan blades and vents—surprisingly important for noisy or weak fans.
- Multimeter: If your fan won’t turn on, this cheap gadget can help you check if power is reaching the unit. You’ll spot wiring issues without guessing.
- Soft brush or old toothbrush: Nothing beats these for scrubbing off cooked-on grime from the fan blades and housing.
- Replacement parts: Simple stuff like fuses, switches, or even a cheap replacement fan belt if your model uses one.
- Protective gloves and goggles: Not fancy, just a good idea when dust, rust, or cleaning fluids are flying around.
It sounds basic, but before you get started, kill the power at the fuse box. Lots of folks forget this, which is just asking for a nasty shock or worse. It takes 10 seconds and could literally save your life.
Never work on an extractor fan that’s still plugged in or connected to the mains. And don’t use metal tools if you’re poking around live wires. If you aren’t sure about something electrical, better safe than sorry—call a pro instead of pushing your luck.
Just so you get an idea of how common some of these issues are, here’s a handy table from a 2023 UK home repairs survey showing what people ran into most often when fixing extractor fans at home:
| Problem | % of Cases |
|---|---|
| Build-up of dust and grease | 38% |
| Loose wiring or poor connection | 22% |
| Faulty switch or control | 17% |
| Damaged fan motor | 14% |
| Broken fan blades | 9% |
This stuff is way more about routine blockage and bad connections than anything major. So, with a few tools and some simple safety steps, most people can handle a decent chunk of extractor fan repair jobs themselves.
When to Call a Professional
Even if you love taking on a bit of extractor fan repair yourself, there are times when DIY just won’t cut it. Some jobs need a qualified electrician or a skilled repair pro—not just for your safety, but so you don’t end up making things worse or voiding your home insurance.
If your fan’s wiring is fried, you spot burn marks, or you smell something odd (like plastic melting), don’t grab a screwdriver—call a qualified technician. If your fan is hardwired into a big power source instead of plugged into a socket, the risks get higher, and poking around inside isn’t a smart move. Also, if your fan’s not working after you’ve already checked your fuse box, cleaned the unit, and tried the simple fixes, there’s probably a deeper, hidden fault.
- If your extractor fan is still under warranty, calling the manufacturer’s service center instead of fiddling yourself can save you cash and headaches.
- Some models, like higher-end kitchen extractor systems, have complex parts or smart controls—it’s easy to make expensive mistakes if you aren’t familiar with them.
If your fan’s noisy even after cleaning, the bearings could be shot. These are tough to replace without the right tools. Plus, sometimes replacing a faulty capacitor or motor is not cost-effective—an expert can tell if it’s worth shelling out for parts, or if you’ll save money in the long run by getting a new unit.
"Anything involving electrical rewiring or installing new connections should be handled by a certified electrician. It’s just not worth risking personal safety or fire hazards for a fan fix," says Nick Barber, Technical Specialist at HomeServe.
| When to DIY | When to Call a Pro |
|---|---|
| Cleaning, replacing accessible filters or covers, tightening loose screws | Electrical problems, strong burning smells, motor or capacitor failure, hardwired setups |
| Checking or replacing wall switches | Complex, high-end fans or systems under warranty |
The bottom line: If your kitchen fan repair or bathroom fan fix seems like more than a basic clean or swap-out, or if you’re ever unsure—don’t risk it, just get an expert in. Peace of mind beats the worry of fire or expensive mistakes.
Simple Tips to Keep Your Fan Running Longer
If you want your extractor fan to survive more than a couple of years, don’t just ignore it until it wheezes or quits. Little things add up and make a big difference with these hardworking gadgets.
- Clean the filters regularly. Grease and dust love to collect on the grill and filters. In the kitchen, this means sticky buildup that slows the fan down and can even make it overheat. For bathroom fans, dust is the big problem. Remove the cover, give it a quick wash with soap and water, and let it dry fully before putting it back.
- Vacuum the blades every few months. Turn off the power, pop off the cover, and gently clean the fan blades. Dusty blades throw the fan off balance and make it noisy, which wears down the motor much faster.
- Check electrical connections once or twice a year. Loose wires or wobbly switches are common causes of wonky fans. Give them a quick look when you’re cleaning. Make sure the power is off before poking around.
- Lubricate the motor if it's not sealed (most older models). A drop of machine oil in the right spot can stop annoying squeaks and creaks.
- Don’t ignore weird noises. Squeaks, rattles, or grinding usually mean something’s off. Catching problems early stops bigger breakdowns.
- Replace filters as needed. In some extractor fan models, especially kitchen fans, a charcoal filter pulls out smells and needs swapping every 6-12 months (check your manual for details).
If you want to know how much work regular maintenance can cut down, check this out:
| Task | Time Spent (per year) | Potential Life Extension |
|---|---|---|
| Cleaning Filters | 2 hours | +1 year |
| Blade Vacuum/Wipe | 1 hour | +1 year |
| Electrical Check | 30 minutes | Stops major fails |
You really don’t need fancy cleaning products or special tools—a gentle brush, some soap and water, and a vacuum do the trick for most extractor fan repair chores. Spending just a few minutes every couple of months can make these fans last ages, and you’ll notice cleaner air, too. Stay on top of maintenance, and you’ll deal with fewer headaches—and less money spent—down the line.