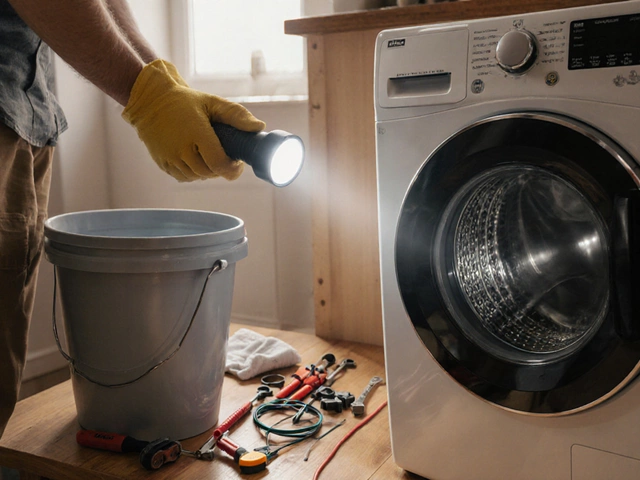
It's never a good time to find your washing machine on strike. That stubborn heap of laundry growing larger by the minute, mocking your every move. You may stand frustrated, but all hope is not lost. Get to know the common failures that your washer may experience and empower yourself with insights to tackle these challenges head-on.
From the motor and drive belt to the mysterious inner workings of control boards, this article delves into the heart of what makes these helpful machines tick—and what makes them stop ticking. Whether you're a seasoned DIY enthusiast or just looking to avoid unnecessary service calls, understanding these common issues will place you in the driver's seat. Ready to roll up your sleeves and dive in? Let's diagnose and fix those pesky problems together.
- Motor and Drive Belt Malfunctions
- The Woes of Water Inlet Valves
- Unveiling the Secrets of Door Latch Issues
- Tackling the Trickiness of Drainage Troubles
- Harnessing the Power of Control Board Diagnostics
- Simple Solutions for Routine Maintenance
Motor and Drive Belt Malfunctions
When your washing machine refuses to spin or agitate, the heart of the problem often lies within the motor and the drive belt. These components are the muscle behind your appliance's operations, propelling the drum into its whirl and twirl. Understanding the mechanics of these crucial parts can help you troubleshoot effectively and keep your appliance running smoothly.
Understanding the Motor
The motor in a washing machine is typically an induction motor that drives the drum with precise control of speed and direction. Over time, wear and tear or electrical failures might hamper its performance. If you hear a humming sound without any drum movement, the motor might be jammed, overheating, or on its last legs.
Symptoms of a Faulty Motor
- The washer won’t start or hesitates to start.
- There is an unusual noise coming from the machine.
- The drum is not spinning or agitating functionally.
When these symptoms arise, the task is to confirm if it's indeed a motor fault.
The Role of the Drive Belt
The drive belt connects the motor to the drum, ensuring that the two parts move in sync. A worn-out or broken belt might result in partial or complete cessation of drum action. If the motor is running, but the drum is not spinning, a snapped belt is the likely culprit.
Diagnosing and Replacing the Drive Belt
- Unplug your washing machine and access the back panel.
- Inspect the drive belt for signs of wear, such as cracks or fraying.
- If the belt is damaged, carefully remove it from its pulleys.
- Replace it with a new, compatible drive belt, ensuring it is tensioned correctly to avoid slippage.
Securing the right tension is vital—too tight and it can strain the motor; too loose, and it will slip off. Once replaced, your washing machine should regain its gusto.
Motor and Belt: Working in Harmony
To prolong the life of your machine, regular maintenance checks can be beneficial. Examine the belt tension and motor condition routinely, even if there are no pronounced issues. Investing a bit of time in preventive care can save you from costly washing machine repair bills down the line.
The Woes of Water Inlet Valves
Ah, the water inlet valves—unsung heroes of the appliance world. They quietly usher water into your washing machine, allowing you to transform piles of dirty laundry into fresh, clean clothes. But what happens when these trusty gatekeepers go rogue? Let's dive into the heart of the issue.
Identifying a Faulty Water Inlet Valve
One of the most common symptoms of a failing water inlet valve is the washer's refusal to fill or, conversely, the machine filling even when it shouldn't. You might also notice inconsistent water temperatures despite selecting specific settings. If you hear an unusual humming or buzzing when the machine is supposed to fill, your water inlet valve might be shouting for help.
Common Causes of Inlet Valve Issues
1. Sediment Buildup: Over time, minerals from hard water can accumulate inside the valve, hindering its operation.
2. Electrical Faults: If the solenoids that control the valve are burnt out or damaged, the valve won't function correctly.
- Check for continuity in solenoids using a multimeter.
- Replace the faulty solenoid if required.
3. Mechanical Damage: Regular wear and tear or accidental damage can lead to valve malfunction.
Preventive Measures
While some wear is inevitable, proper maintenance can prolong the life of your water inlet valve:
- Regular Inspection: Periodically check the valve and surrounding components for visible wear.
- Clear the Inlet Filters: Every few months, inspect and clean the screens at the ends of the inlet hoses. These screens catch sediment and can become clogged.
- Soft Water Benefits: Consider installing a water softener if you live in a hard water area. This helps limit mineral buildup.
Troubleshooting and Repair
If you're confident in your DIY abilities, addressing some water inlet valve issues is within your reach. Start by disconnecting the washing machine from power and water supplies. With access to the valve, verify that it's seated correctly. Replace it if necessary, keeping in mind that many valves are now readily available online or in local hardware stores.
Tackling water inlet valve problems might seem daunting, but with a bit of patience and know-how, you'll be back on track in no time. The satisfaction of conquering such a challenge is as satisfying as pulling on a freshly laundered sweater on a chilly morning in Auckland!
Unveiling the Secrets of Door Latch Issues
Ever found yourself locked out of the laundry room, not by the door to the room, but by the door of your own washing machine? Door latch issues are more common than you'd think, and they can be a real headache, even for seasoned DIY enthusiasts. Fortunately, diagnosing and fixing these issues can be straightforward with the right guidance.
The Main Culprit: The Door Lock Assembly
In most modern washers, the door lock assembly is a crucial component ensuring that the door remains shut while the machine is in use. This safety feature prevents water spillage and ensures interruption-free operation. If you've ever tried running your washer with the door ajar, you'll know that the machine refuses to start. A malfunction here can leave you scratching your head when the washer simply won't lock or unlock properly.
The door lock assembly consists of the locking mechanism itself, a latch striker, and various switches or sensors that signal the control board when the door is securely closed. In some cases, wear and tear or an accidental slam can misalign or damage these parts.
How to Identify Door Latch Problems
If your washing machine won't start or you find that the door won't lock or unlock, the fault likely lies in the door latch system. Begin by checking if the door closes properly. Is there resistance or misalignment? Look for any visible damage to the latch striker or the lock assembly.
- Striker Misalignment: This is often a result of physical mishandling. If the striker is out of place, realigning it might solve the problem.
- Defective Door Lock: Sometimes the lock mechanism itself fails, either due to electric faults or mechanical wear. Listen for a clicking sound when you close the door; absence of this sound could indicate an issue.
- Sensor Failure: If the door sensor is faulty, it might not relay the correct information to the control board, preventing the machine from starting.
Steps to Fix Door Latch Issues
- Unplug the washer before performing any repairs. Safety first!
- Inspect the door striker for alignment; adjust as needed.
- Test the electrical current flowing to the door lock assembly using a multimeter. A lack of continuity might indicate a need for replacement.
- Remove the defective lock assembly carefully and install a new one, ensuring all connections are secure.
- Test the machine by running a cycle to ensure the issue is resolved.
Pro Tip:
Keep in mind the specific model of your washing machine when sourcing replacement parts, as compatibility is crucial. Also, regular cleaning of the interior of the door lock area can help prevent buildup that may contribute to latching issues over time.
By understanding these common washer malfunctions and solutions, you'll be better prepared to handle door latch issues and maintain the smooth operation of your washing machine. Armed with a little knowledge and patience, most repairs are well within reach, even for the weekend repair warrior.
Tackling the Trickiness of Drainage Troubles
A washing machine that refuses to drain can quickly turn laundry day into a chaotic affair. Fortunately, understanding the common culprits behind drainage issues can help you save the day. Often, these problems boil down to simple blockages or malfunctioning parts.
Common Causes of Drainage Issues
Before diving into more complex repairs, consider checking for these usual suspects:
- Clogs in the Drain Hose: Over time, soap residue, lint, and small clothing articles can accumulate in the drain hose, creating a stubborn blockage.
- Faulty Drain Pump: The drain pump, responsible for expelling water, might be jammed with debris or suffering from motor failure.
- Blocked Coin Trap: Many washers come equipped with a coin trap or filter, meant to catch foreign objects. A clogged trap can prevent proper drainage.
Troubleshooting Steps
- Check and Clean the Drain Hose: Detach the hose from the washer and visually inspect it for blockages. Run water through it to ensure it's clear.
- Inspect the Drain Pump: Look for visible obstructions and remove them. If the pump's motor doesn't make noise during operation, the motor may need replacement.
- Empty the Coin Trap: Check your washer's manual to locate the trap. Remove it and clean out any accumulated debris.
As appliance expert Tom Jennings emphasizes,
"Regular maintenance is key. Addressing small clogs early can prevent bigger headaches later on."His wisdom echoes what many seasoned homeowners learn the hard way.
When to Call a Professional
If you've exhausted DIY solutions and the problem persists, it might be time to call in reinforcements. Persistent issues could be indicative of deeper electronic malfunctions or require specialized tools for resolution.
Tackling washing machine repair like a pro not only saves you money but also gives a sense of accomplishment. Addressing drainage troubles doesn't have to be a daunting task—armed with the right knowledge and a touch of tenacity, your washing machine will be back in action in no time.
Harnessing the Power of Control Board Diagnostics
Ah, the control board. It's the brain of your washing machine, orchestrating every wash and rinse cycle with precision. Yet, when it malfunctions, it can leave your washing machine repair ambitions high and dry. Understanding control board diagnostics can feel like deciphering a technological enigma, but fear not—a little knowledge goes a long way.
Understanding the Basics of Control Boards
The control board, often referred to as the main circuit board, is packed with electronic components and intricate circuits. It processes input from various sensors and relays instructions to different parts of the machine, such as the motor and valves. Modern washers sometimes feature digital displays indicative of board status, easing the diagnostic process.
Common signs of control board issues include abrupt stopping mid-cycle, failure to start, or sporadic error codes flashing on the display. These symptoms are often what lead to frustrations around home appliance maintenance.
Step-by-Step Diagnostic Process
- Symptom Identification: Before diving into the circuitry, take note of any patterns or specific error codes. This information can be crucial.
- Power Inspection: Make sure the power supply to the washing machine is stable. A flickering display might be due to voltage fluctuations rather than a faulty board.
- Visual Inspection: Carefully remove the top or rear panel of your washer to access the control board. Look for obvious signs of damage such as burnt marks, broken connectors, or corrosion.
- Board Testing: This step may require a multimeter to check for continuity and ensure that electricity flows where it should.
- Resetting the Control Board: Sometimes, a simple reset can resolve electronic glitches. This typically involves unplugging the machine for a few minutes.
When to Call in the Experts
While DIY diagnostic efforts can often solve minor issues, control board replacement, when necessary, is a task best left to the professionals. Not only do they have access to genuine parts, but they also bring an expert eye that's attuned to the nuances of board repairs.
Consider the Cost-Benefit
The average cost for replacing a control board runs between NZD $250 to $400, depending on the model and brand of washer. Compare this to the cost of a brand-new machine when weighing your options.
By harnessing the power of control board diagnostics, you're not just tackling immediate repair needs—you're investing in long-term machine appliance maintenance. Understanding your machine’s brain today ensures fewer headaches tomorrow.
Simple Solutions for Routine Maintenance
Make no mistake, regular maintenance is the secret sauce to keeping your trusty washing machine humming along efficiently. A bit of attention now can prevent costly repairs and extend the life of your appliance.
Check and Clean the Filters
First on the agenda is tackling those pesky filters. Over time, they can become clogged with lint and debris, which can wreak havoc on your machine's efficiency. Every few months, make it a point to clean out both the lint filter, usually found in the drum, and the inlet filters located at the back where the water supply attaches.
- Turn off the water and unplug the machine for safety.
- Detach the hoses and clean the screens with a soft brush under running water.
- For the lint filter, slide it out and remove any accumulation.
- Replace everything, ensuring a snug fit to prevent leaks.
Inspect the Door Seal
Ah, the humble door seal. Its job? Keeping water inside. Its Achilles' heel? Mold and mildew. After every load, leave the door open to air out the moisture. If you spot any black spots, mix white vinegar with baking soda to scrub away the grime.
Run a Cleaning Cycle
It might seem counterintuitive to wash your washer, but it's key to maintenance. Aim to run an empty cycle with hot water and two cups of vinegar once a month to dissolve detergent build-up and sanitize the drum.
Balance the Load
A well-balanced load can work wonders on your washer's lifespan. Overloading or imbalanced loads strain the inner drum and motor. Stick to recommended weight limits, and when in doubt, run smaller batches in quick succession rather than one gargantuan load.
Energy and Water Consumption
Did you know that regularly maintained washing machines consume significantly less energy? According to a recent study, efficient machines use up to 30% less power and 25% less water compared to poorly maintained ones.
| Maintenance Type | Frequency | Benefits |
|---|---|---|
| Clean Filters | Every 3 Months | Improved Water Flow |
| Inspect Door Seal | Monthly | Prevents Mold Growth |
| Run Cleaning Cycle | Monthly | Disinfects Drum |
| Balance Load | Every Use | Prevents Wear |
By integrating these simple solutions into your routine, not only will you optimize the performance of your appliance, but you'll also save a tidy sum on repairs and spare parts. It's a win-win!