Ever woke up to a cold shower on a Monday morning? Yeah, that's probably your water heater plotting against you. Thing is, most water heaters actually throw out warning signs before crashing. Catch those signs early, and you’ll save yourself a lot of hassle and money.
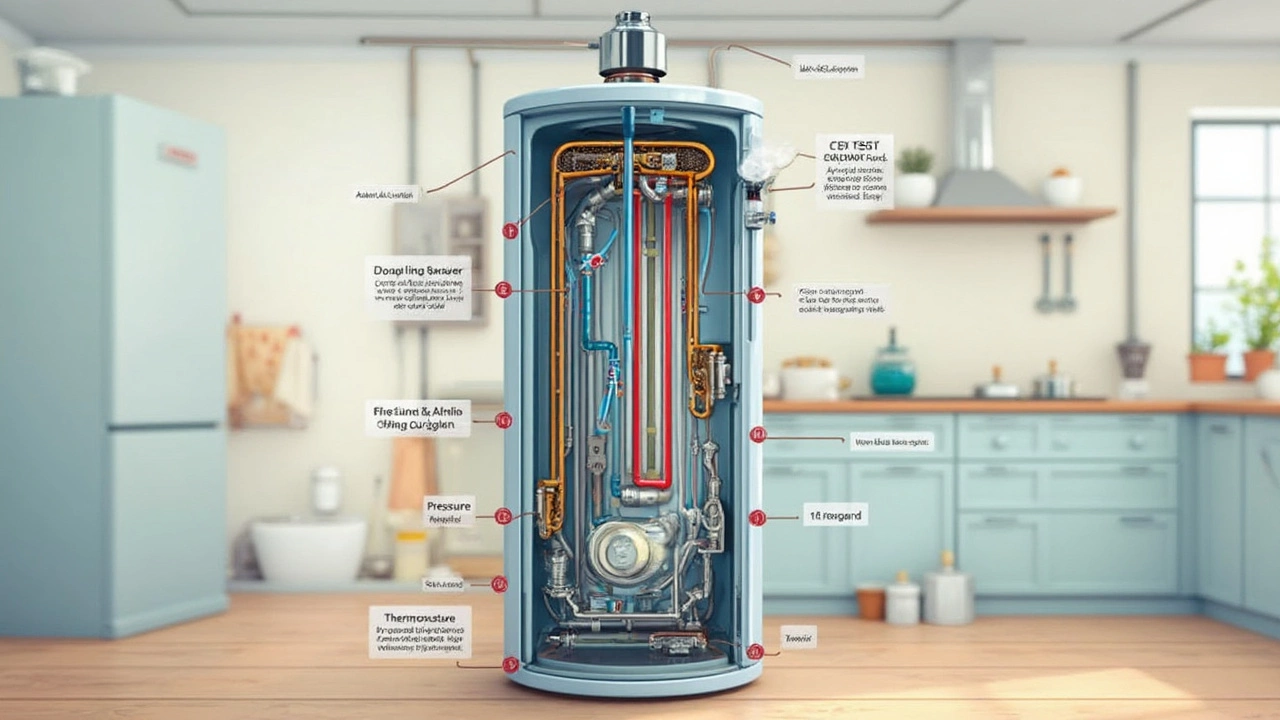
First off, there are a handful of parts that seem to break way more often than others. Don’t worry, you don’t need to be a plumber to figure them out—just a bit of curiosity and maybe a flashlight. For example, heating elements in electric water heaters are kind of like the light bulbs of your tank—they lose juice over time and just burn out. Gas heaters love to mess with us by letting their thermocouples go bad, which shuts off the whole show.
Other things don’t break as quickly but make a mess. Got rusty water or a puddle under your tank? The anode rod or the tank itself could be crying for help. And don’t forget those sneaky temperature and pressure valves—if they get stuck, you’re either in for no hot water or a tank that tries to reenact Old Faithful in your garage.
- The Usual Suspects: Most Common Water Heater Failures
- Heating Elements and Their Woes
- Of Thermostats and Temperature Troubles
- Tank Issues: Leaks and Corrosion
- Valves and Connections That Let You Down
- Simple Tips to Make Your Water Heater Last
The Usual Suspects: Most Common Water Heater Failures
When your trusty tank stops working, it usually boils down to a short list of troublemakers. Most of the time, repairs focus on these problem areas rather than the whole heater. Knowing what tends to break first can help you figure out what’s worth fixing and when you’re better off getting a new unit.
Here's the line-up of the most common water heater issues:
- Heating Elements: These are the parts that actually heat your water. In electric models, these burn out after a few years. You’ll spot trouble if your water is lukewarm or never quite hot enough.
- Thermostats: If the temperature is way off—either too hot or just not getting there—blame the thermostat. They go bad way more often than most people realize.
- Anode Rods: Picture a metal stick inside your tank, taking one for the team by attracting corrosion. When it’s shot, rust starts eating the tank itself.
- Temperature & Pressure Relief Valves (T&P Valves): This valve is supposed to keep your tank from exploding. If it’s leaking or stuck, your system isn’t safe.
- Tank Leaks: If you see water anywhere it shouldn’t be, you could be dealing with a corroded tank. Unfortunately, that often means game over for the heater.
Wondering how common these failures actually are? Here's a quick comparison—stuff I wish I’d known before explaining to my kid Rowan why she had to take a cold bath:
| Part | Average Lifespan (years) | Percent of Repairs |
|---|---|---|
| Heating Element | 6-8 | 40% |
| Thermostat | 6-10 | 25% |
| Anode Rod | 3-5 | 15% |
| T&P Valve | 5-7 | 10% |
| Tank Corrosion/Leaks | 10-15 | 10% |
Most repairs involve swapping out parts, not overhauling the whole setup. With regular checks, you can spot a dying part before your morning shower turns arctic. And if you hear odd noises, see rusty water, or your hot water runs out insanely fast, odds are one of these suspects is behind it.
Heating Elements and Their Woes
If your electric water heater suddenly goes cold, odds are the heating element is to blame. These elements are basically thick metal coils that sit inside the tank and heat the water, similar to how your toaster works. When they burn out, they just stop working—no drama, just ice-cold showers.
I once changed out a heating element before my kid Rowan’s bath time when I noticed the water wouldn’t get past lukewarm. Turns out, this is a classic sign. Heating elements tend to give out after about 6-10 years, but hard water can speed things up.
“Most water heater failures are linked to worn-out heating elements, especially where water is hard or mineral-heavy.” – National Association of Home Builders
So what causes the burnout? Mostly it’s mineral buildup, which coats the element and makes it work harder until it finally pops. Sometimes you’ll hear a popping or sizzling noise, especially if your town is known for hard water—kind of like my place, where Luna the cat gets mineral rings in her water bowl.
- If you’ve got no hot water at all, that’s a pretty clear sign the element’s dead.
- Slow recovery time? Could mean it’s struggling but not fully gone.
- Unusual sounds? That’s mineral buildup boiling off.
Swapping out a heating element isn’t rocket science, but remember to cut the power first (trust me on this one). Here’s a quick rundown if you’re the DIY type:
- Turn off the heater’s breaker.
- Shut off the cold water supply.
- Drain some water from the tank.
- Disconnect the wires from the element.
- Unscrew the bad element and pop in a new one.
- Reconnect, refill, and give it juice.
| Average Heating Element Lifespan | Replacement Cost (Typical) | Signs of Failure |
|---|---|---|
| 6-10 years | $20 - $60 (part only) | No hot water, slow recovery, popping noises |
Watch out for rust or white crust on the old element. If you see lots of buildup after a few years, consider flushing your tank twice a year instead of just once. That’ll help your water heater last and keep the hot water flowing right when you need it most.
Of Thermostats and Temperature Troubles
Thermostats in water heaters get blamed for a ton of issues—you run out of hot water, or it’s suddenly hotter than a sauna, or your tap water turns ice cold for no reason. That little thermostat inside your tank is responsible for picking when to heat and how much, and when it goes haywire, everything gets out of whack.
Electric water heaters usually have two thermostats—one up top, one at the bottom. If either gets stuck, misreads the temp, or just breaks, you might only get half a tank of hot water or none at all. Gas heaters use a different style (they call it a gas control valve or thermostat), but when those break, the whole heater usually shuts off and you’re left boiling water on the stove instead.
Here’s how you can tell the thermostat might be the problem:
- Hot water runs out way too fast, but recovers after a long wait.
- The water is scalding, no matter how low you set the dial.
- The water never gets hot enough, and you haven’t messed with the settings.
- You hear the heater turning on and off a lot more than usual.
You don’t always have to replace the whole heater for a busted thermostat. Sometimes, you can replace just that part. It’s usually a pretty cheap fix compared to buying a whole new unit—and you can find replacement kits at most hardware stores. Just turn off the power first if you're checking anything electrical. If you’re not sure which thermostat is bad, some simple testing with a multimeter will show you the trouble spot.
A quick tip: Check for loose wires and make sure the temperature dial isn’t set ridiculously high or super low by accident. Rowan managed to bump ours once during a hide-and-seek marathon, so stranger things have happened. Use your judgment, and if you keep having thermostat issues, it’s time to call in a pro to avoid scalds or cold showers.
Remember, the heart of water heater repair often comes down to fixing or swapping out a simple thermostat. It’ll save you a lot of grief if you act before things get worse.
Tank Issues: Leaks and Corrosion
Leaks are usually what push people to finally deal with their water heater. When a puddle forms under the tank, it rarely means anything good. Truth is, a leaking tank is often the sign of corrosion inside the metal. Most standard tanks are made of steel, so once rust shows up, things can go downhill fast. The protective glass lining can crack over time, letting water slowly eat away at the steel beneath.
The most common weak spot is actually the water heater's anode rod. This sacrificial stick of metal sits inside the tank and draws corrosion to itself instead of your tank walls. If the anode rod wears out—and never gets replaced—the tank itself becomes the next target for rust. It happens pretty often because almost nobody thinks to check or replace this part until it’s too late.
Noticed rusty or orange-tinted water? That’s another sign your tank has internal corrosion. After that, it’s just a matter of time before a leak turns into a full rupture. According to the U.S. Department of Energy, "Water heater tanks corrode from the inside out, making leaks inevitable as the anode rod decays and the glass lining is breached."
"Over 75% of water heater failures are due to a slow, hidden leak that started from inside corrosion, not obvious cracks or holes.”—Home Inspection Insider
If your tank is leaking from the bottom, you’re probably looking at a complete replacement. The only fix for a rusted-out tank is a new one. If you see water around pipes or fittings at the top, double-check those connections first—it might just be a loose valve or bad T&P (temperature and pressure) relief valve. That’s a much cheaper, quicker fix you can sometimes handle with a wrench.
Here’s a quick list of what to keep an eye on:
- Rusty or colored water from faucets
- Dampness or puddles under or near the tank
- Loud popping or cracking sounds (mineral buildup causing hot spots)
- Visible rust around fittings, pipes, or seams
Get in the habit of checking the anode rod every year or two. That little chore might just keep your tank running years longer.
Valves and Connections That Let You Down
If you’ve ever heard a loud hissing or found a puddle next to your water heater, chances are you’re dealing with valve or connection issues. The two biggest troublemakers here are the temperature and pressure relief valve (T&P valve) and the drain valve. Both are tiny parts, but when they go bad, your whole water heater routine can fall apart.
The T&P valve is basically the safety net. Its job? To release water if the tank pressure or temperature gets too high—like a pressure cooker’s steam release. But these valves aren’t immortals. Over time, they can get clogged with mineral buildup or just wear out, and instead of releasing water safely, they can either leak nonstop or stop working completely. The Consumer Product Safety Commission reports thousands of water heater failures every year, and a stuck T&P valve is right up there on the list of causes.
The drain valve at the bottom of the tank can give you grief, too. It’s there so you can flush out sediment once in a while, but cheap plastic versions crack or get stuck shut. Metal ones fare better, but after years of heat cycles and sediment, even those can start seeping. If you’ve got constant drips from the drain, replacing the valve is usually an easy fix.
Don’t ignore the incoming cold-water and outgoing hot-water connections, either. These fittings, often made with simple threaded couplings, can loosen or corrode, especially if you live where hard water is the norm. Corroded connections are a main player in household water heater leaks.
- Check the T&P valve for rust or constant drips. Pull the test lever—water should shoot out and stop right away.
- If you see wet insulation at the base, the drain valve might be weeping. Try gently tightening it, but swap it for a metal replacement if it’s leaking more than that.
- Look for white or green crusty buildup on the fittings. That’s hard water’s handiwork, and it means you might need to reseal or replace a connection.
| Component | Common Failure | Cost to Replace (Approx.) |
|---|---|---|
| T&P Valve | Leaking, failure to open | $20–$40 |
| Drain Valve | Dripping, broken handle | $10–$25 |
| Pipe Connections | Corrosion, leaks | $10–$50 (fittings) |
Replacing a valve or fitting is a quick project if you catch it early. But if you ignore a slow leak, you could be facing not just a broken water heater, but water damage to your home. So, whenever you’re poking around the tank, check these spots. A five-minute check can save you a ton of headaches later.
Simple Tips to Make Your Water Heater Last
You want hot water when you need it, not a surprise indoor pool or a freezing rinse. Taking care of your water heater is way easier than dealing with the headache when it breaks down. Seriously, a few simple habits can add years to its life and keep you from getting stuck in plumbing emergencies.
- Water heater tanks should be flushed every year. Sediment builds up at the bottom and acts like insulation—your heater works harder, and you get less hot water. Just attach a hose to the drain valve and let the gunky stuff flow out. If your water is hard, do it twice a year.
- Check your anode rod every 2-3 years. This part attracts corrosion so your tank doesn’t rust out. If it’s less than half an inch thick or looks totally crusty, swap it out. A $20 rod can save you a grand or two down the road.
- Test the temperature and pressure relief valve (T&P valve) once a year. Just flip the lever and let it snap back. If water doesn’t gush out, you know it’s time to replace it—don’t ignore this, because a stuck T&P valve is a safety risk.
- Set your thermostat to 120°F. Hotter isn’t better—scalding temps will wreck your heater and your wallet. Plus, kids (and dogs) don’t need water at 140°F.
- Look for leaks and drips every now and then. Rusty spots around fittings, puddles under the tank, or weird noises like popping and hissing mean you should call in some help before a small fix turns into a shower disaster.
Here’s a quick look at how just a bit of attention can save you cash and hassle:
| Maintenance | Average Cost | Failure Risk Reduced |
|---|---|---|
| Flushing tank yearly | $0-$100 | Up to 60% |
| Replacing anode rod | $20-$100 | Up to 90% |
| Testing T&P valve | Free | Up to 50% |
| Lowering temperature | Free | Up to 10% |
Don’t skip these checks. It’s way less hassle than hauling out soaked carpets or dealing with angry family members who missed their morning shower.