If your electric oven isn’t heating, takes forever to warm up, or shuts off randomly, you don’t need to call a technician right away. Most common oven problems can be diagnosed with basic checks you can do in under 30 minutes. You might even fix it yourself without spending hundreds on a repair bill.
Check if the oven is getting power
The first thing to rule out is whether the oven is getting electricity at all. Start by checking the circuit breaker. In New Zealand, most electric ovens run on a 32A or 40A dedicated circuit. If the breaker has tripped, reset it. If it trips again immediately, there’s a serious fault-stop and call an electrician.
Next, look at the oven’s display. If it’s completely blank, the issue could be a blown thermal fuse or a faulty control board. If the display lights up but the oven won’t heat, the problem is likely in the heating elements or thermostat.
Try plugging in another appliance, like a toaster, into the same outlet (if it’s a plug-in model). If that doesn’t work, the problem might be with the wall socket or wiring. Most built-in ovens are hardwired, so you’ll need to check the junction box behind the oven. Turn off the power at the breaker before doing this.
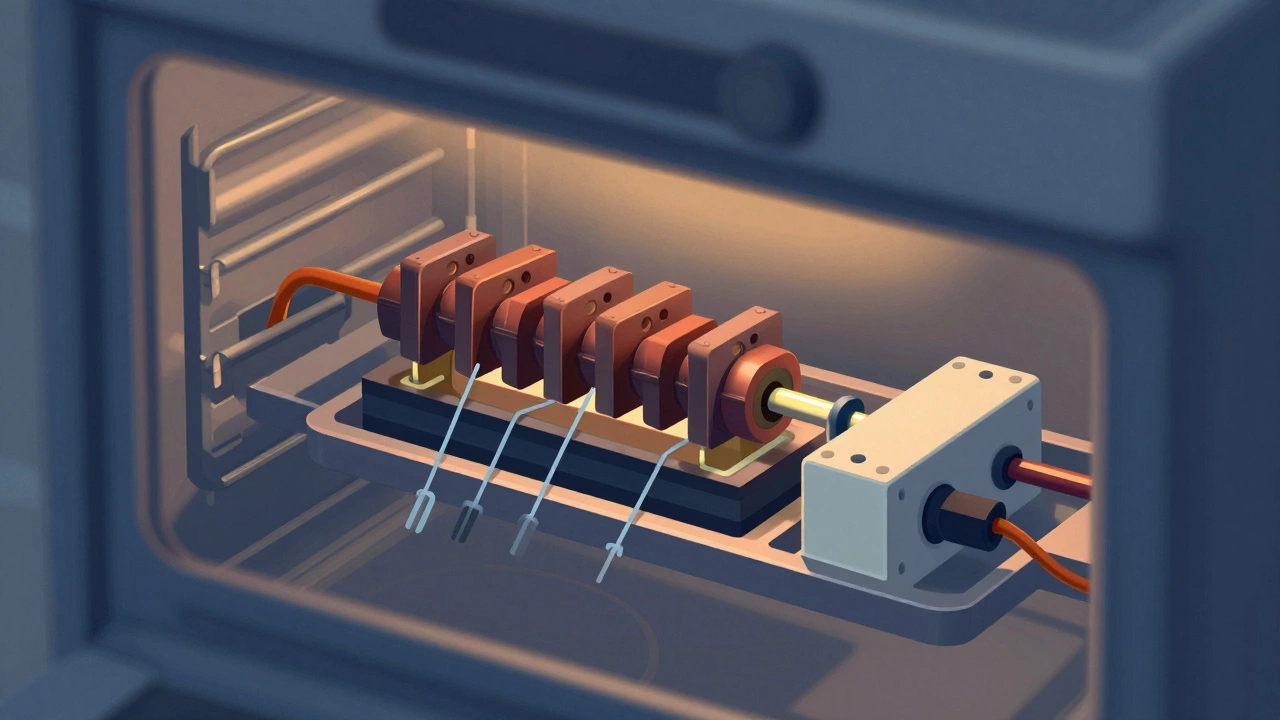
Inspect the heating elements
Electric ovens have two main heating elements: the bake element (bottom) and the broil element (top). When either fails, the oven won’t heat properly.
Turn the oven on to 180°C and watch the bake element through the door. It should glow bright orange within 5-10 minutes. If it stays dark, it’s likely dead. The broil element should glow when you select broil mode. If neither glows, test both with a multimeter.
To test an element:
- Turn off the power at the breaker.
- Remove the screws holding the element in place.
- Disconnect the wires (take a photo first so you know where they go).
- Set your multimeter to ohms (Ω) and touch the probes to the two terminals on the element.
- A good element reads between 20 and 120 ohms. If it shows infinite resistance (OL), the element is blown.
Even if the element looks fine-no visible cracks or bulges-it can still be faulty. Don’t rely on appearance alone.
Test the oven thermostat
A faulty thermostat is one of the most common reasons ovens don’t reach the right temperature. You might notice food cooking unevenly, burning on the bottom, or taking twice as long as the recipe says.
Thermostats don’t usually fail completely-they just drift out of calibration. The easiest way to check is with an oven thermometer. Place it in the center of the middle rack, set the oven to 180°C, and let it preheat. After 20 minutes, check the thermometer. If it reads more than 15°C off, your thermostat is inaccurate.
Some ovens have digital controls that can be recalibrated. Check your manual for a calibration setting. For older models with a dial thermostat, replacement is usually the only fix. The thermostat is connected to a capillary tube that runs to the oven cavity. If that tube is kinked or damaged, the thermostat won’t sense temperature correctly.
Check the oven sensor (for modern ovens)
If your oven has a digital display and precise temperature control, it likely uses an oven temperature sensor instead of a mechanical thermostat. This sensor is a small metal probe, usually mounted on the back wall of the oven cavity.
At room temperature, the sensor should read around 1000-1100 ohms. Use a multimeter to test it:
- Turn off power.
- Remove the two screws holding the sensor.
- Disconnect the wires.
- Touch the multimeter probes to the two terminals.
If the reading is way off (like 500 ohms or 2000 ohms), the sensor needs replacing. A bad sensor can cause the oven to overheat, underheat, or shut off unexpectedly. Many people mistake a faulty sensor for a broken element.
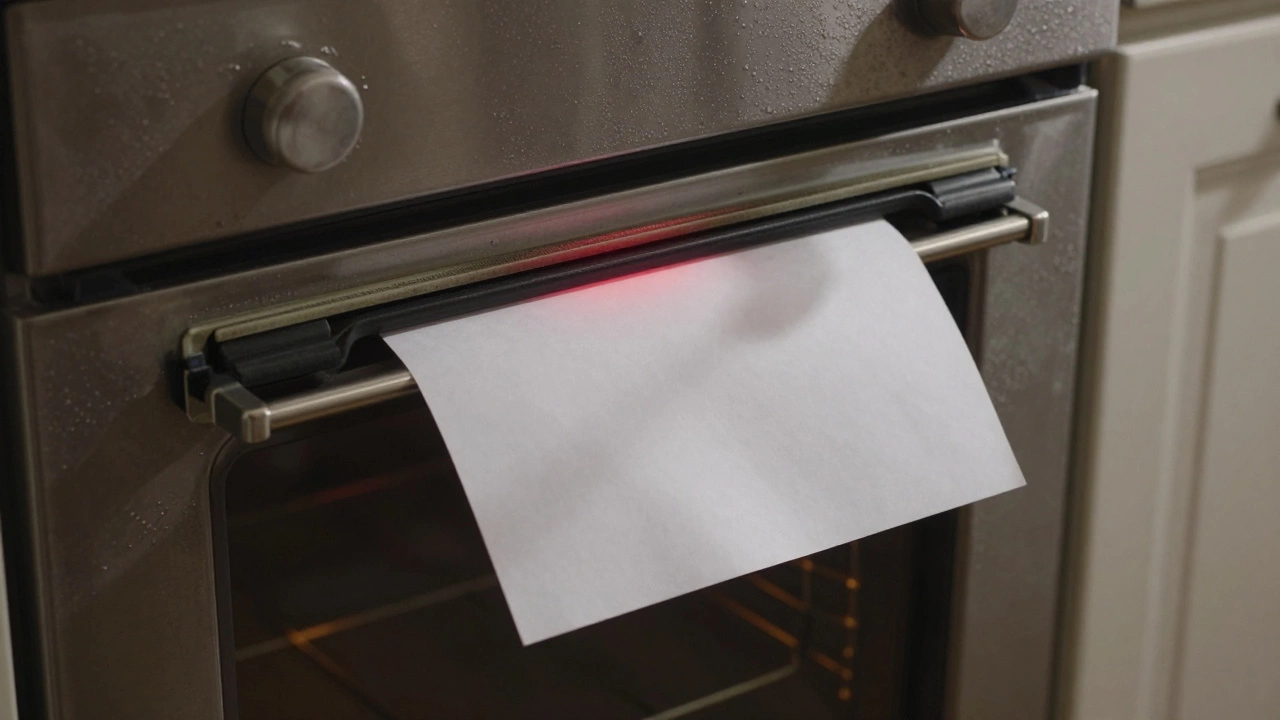
Look at the door seal and latch
A damaged door seal lets heat escape, forcing the oven to work harder and sometimes shut down early to avoid overheating the control panel. Check the rubber gasket around the door. If it’s cracked, brittle, or has gaps, it’s not sealing properly.
Try the paper test: close the door on a piece of paper. If you can pull it out easily, the seal is weak. Replacing the gasket is cheap and easy-most ovens use a simple clip-in design.
Also check the door latch. If it doesn’t click shut properly, the oven may not start or may turn off during use. Some models have a safety switch that prevents operation unless the door is fully locked.
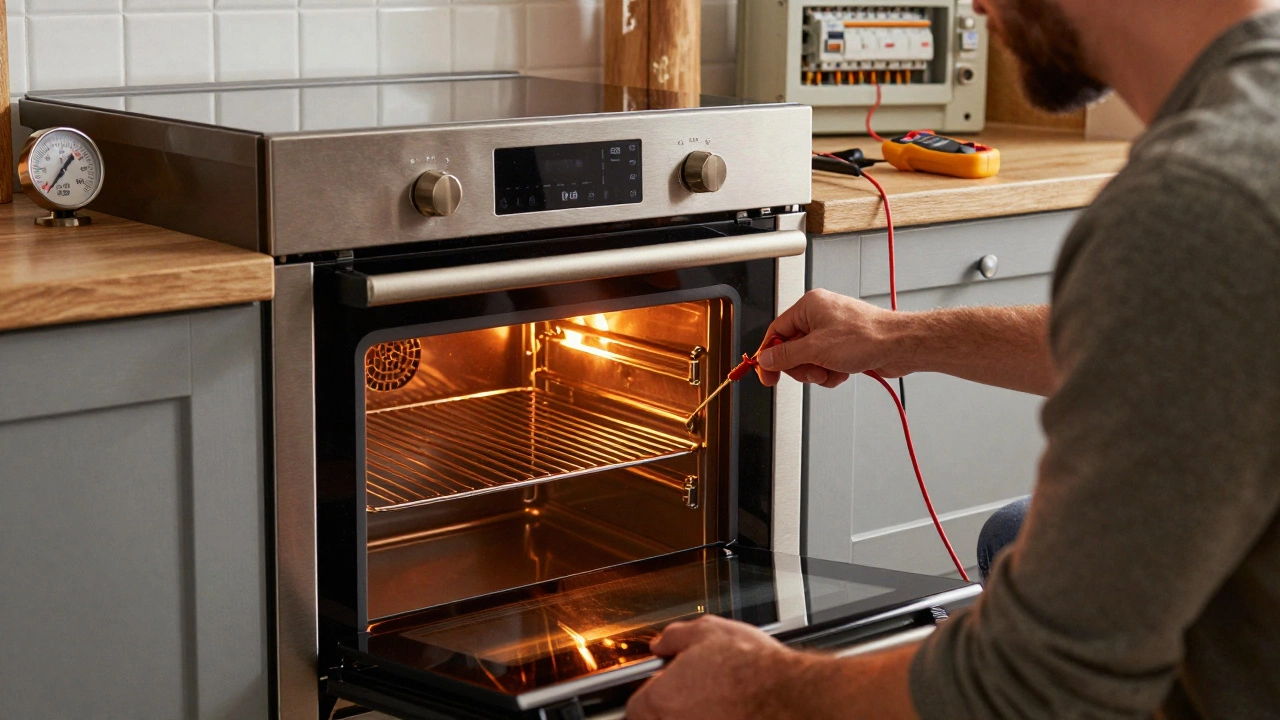
Examine the control board and relay
If all the elements, sensor, and thermostat check out, the problem might be the control board. This is the brain of the oven. It sends power to the heating elements based on what you set.
Signs of a failing control board:
- The oven turns on randomly or shuts off mid-cycle
- Error codes appear on the display (like E1, F2, or E3)
- Buttons don’t respond or respond inconsistently
Control boards can’t be tested easily without a schematic. If you’ve ruled out everything else, and the oven still doesn’t work, the board is the likely culprit. Replacing it requires removing the front panel and disconnecting multiple wire harnesses. It’s not a beginner job, but it’s cheaper than calling a technician.
What if the oven heats but unevenly?
Uneven cooking doesn’t always mean a broken part. It could be simple:
- Food is placed too close to the heating element
- The oven rack is in the wrong position
- The fan isn’t working (in convection ovens)
If you have a convection oven, check the fan. It should spin quietly when the oven is on. If it’s noisy or doesn’t turn, the fan motor might be seized. Some models have a separate fuse for the fan. Check your manual.
Rotate your baking tray halfway through cooking. If one side still cooks faster, the bake element might be weak on one side-even if it glows, it could be partially burned out.
When to call a professional
You should call a technician if:
- You smell burning plastic or see smoke
- The circuit breaker trips repeatedly
- You’re uncomfortable working with electrical components
- The oven is over 15 years old and multiple parts are failing
Older ovens often have parts that are no longer made. Replacing a control board or sensor might cost more than buying a new oven. If your oven is more than a decade old, consider whether a repair is worth it.
Also, never try to repair a gas oven yourself unless you’re certified. Gas leaks are dangerous. This guide only applies to electric ovens.
Quick diagnostic checklist
Here’s a simple flow to follow when your oven isn’t working:
- Is the circuit breaker on? → If no, reset it.
- Does the display work? → If no, check the thermal fuse or control board.
- Do the heating elements glow? → If no, test with a multimeter.
- Is the temperature wrong? → Use an oven thermometer.
- Is the door sealing properly? → Do the paper test.
- Any error codes? → Look them up in the manual.
If you’ve gone through all these steps and still can’t find the issue, the problem is likely deeper-like a faulty relay, wiring fault, or control board failure. At that point, it’s time to call a qualified appliance repair technician.
Keeping your oven running well isn’t about fancy tools-it’s about knowing what to check and when to stop. Most electric oven problems are simple. You just need to look in the right places.