Extractor Fan Calculator
Calculate Your Fan Requirements
Recommended Airflow
Minimum airflow required
L/s
Why This Matters
Proper airflow prevents mold, moisture damage, and health hazards. Your calculation follows New Zealand building standards (Clause G12).
Most people think installing an extractor fan is just a matter of drilling a hole and plugging it in. But if you’ve ever tried it, you know it’s not that simple. One wrong cut, a loose wire, or a poorly sealed duct, and you’re left with mold, noise, or worse-water damage behind the wall. The good news? You can install an extractor fan yourself-if you know what you’re doing. The bad news? Many don’t, and end up calling a professional anyway.
Why You Might Want to Do It Yourself
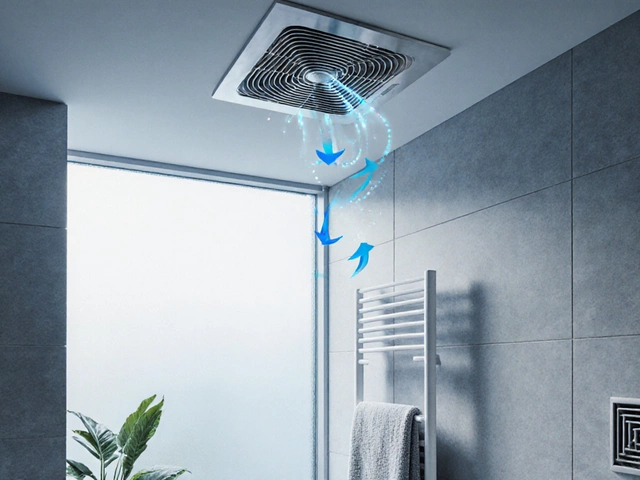
Installing an extractor fan isn’t just about saving $200-$400 in labor. It’s about control. You pick the exact model, the exact location, and the exact time. No waiting for a technician. No surprise charges. If you’re handy with basic tools and understand how electricity and airflow work, this is one of the smarter DIY projects you can take on.In Auckland homes, extractor fans are critical. Humidity from showers, cooking, and drying clothes builds up fast. Without proper ventilation, walls get damp, tiles start peeling, and black mold grows in corners you didn’t even know were there. A working extractor fan isn’t a luxury-it’s a health requirement.
What You’ll Need Before You Start
You can’t just grab a fan from the hardware store and start drilling. First, you need to know what you’re installing. Here’s what to check:- Fan type: Is it ceiling-mounted, wall-mounted, or inline? Ceiling fans are most common in bathrooms. Wall fans are often used in kitchens.
- Power source: Does it plug in or need hardwiring? Most extractor fans connect directly to your home’s electrical system. That means turning off the circuit breaker.
- Ducting: Does it vent to the outside? Never vent into the roof cavity. That’s a recipe for rot and mold. You need a duct that runs directly through an external wall or roof.
- Size: Fan capacity is measured in liters per second (L/s). For a standard bathroom (5-8 m²), you need at least 15-20 L/s. For a kitchen, aim for 30 L/s or more.
Popular models like the Broan-NuTone 9093 or EnviroVent ECO 100 are widely available in New Zealand and designed for DIY installation. Look for ones labeled ‘easy-fit’ or ‘self-venting’.
Step-by-Step: How to Install an Extractor Fan
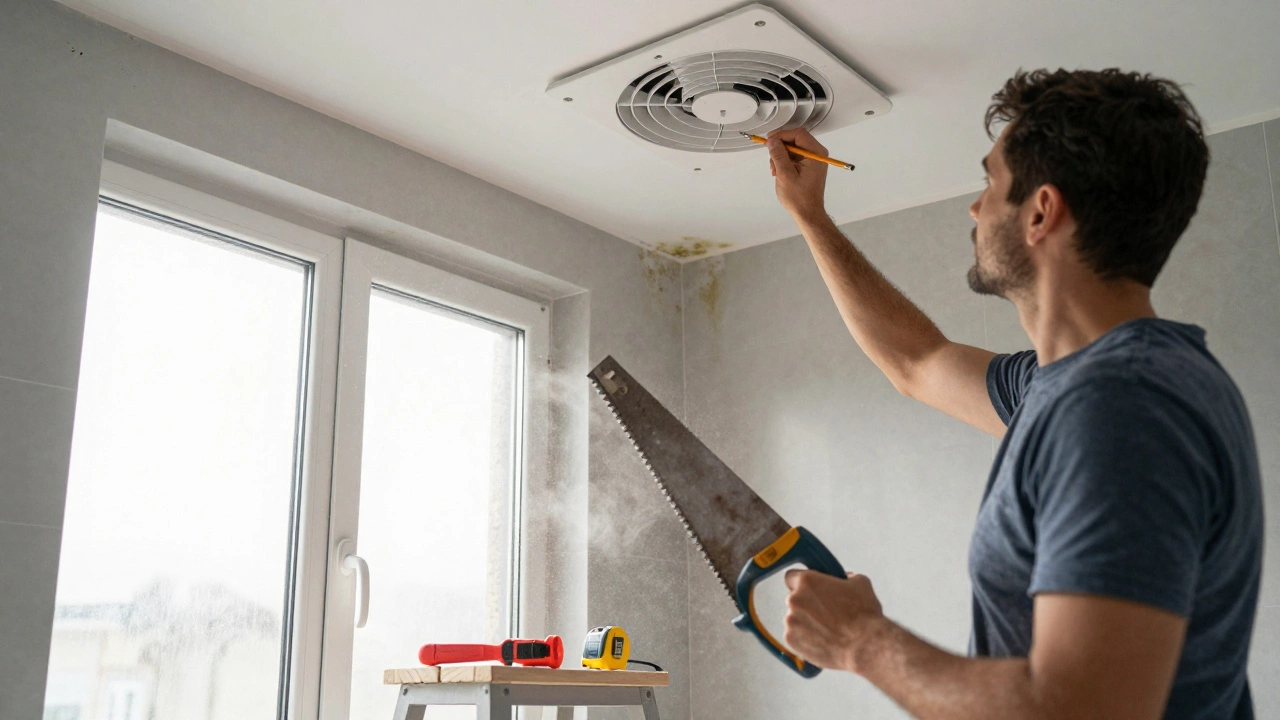
Step 1: Turn off the power Go to your switchboard and turn off the circuit that powers the bathroom or kitchen. Use a non-contact voltage tester to confirm there’s no electricity running to the existing fixture-if you’re replacing one. Don’t guess. Test it twice. Step 2: Remove the old fan (if applicable) Unscrew the cover, disconnect the wires, and remove the mounting frame. Take note of how the old duct was connected. You’ll want to reuse the same path if possible. If there’s mold or debris in the duct, clean it out. Don’t just cover it up. Step 3: Mark and cut the opening Place the new fan over the spot where you want it. Trace the outline with a pencil. Use a drywall saw or jigsaw to cut the hole. Go slow. If you cut too big, the fan won’t fit snugly. If you cut too small, you’ll have to start over. Step 4: Run the duct to the outside This is where most DIYers mess up. The duct must run directly to the exterior. No shortcuts. No bending it into the ceiling cavity. Use rigid aluminum ducting-not flexible plastic. Flexible ducts sag, collect moisture, and restrict airflow. Connect the duct to the fan using a metal clamp. Seal the joint with foil tape, not duct tape. Duct tape dries out and falls off in humid environments.If you’re venting through a wall, drill a hole slightly larger than the duct. Use a wall vent cap designed for extractor fans. Seal around the outside with silicone to stop rain from getting in.
If you’re venting through the roof, use a roof termination kit. Make sure it’s pitched correctly so water runs off, not into your attic.
Step 5: Mount the fan Slide the fan into the hole. Most models have spring-loaded clips that hold them in place. Tighten the screws or clips until the fan is flush with the ceiling or wall. No wobbling. Step 6: Wire it up Connect the wires: black to black (live), white to white (neutral), green or bare to the earth terminal. If your fan has a light or humidity sensor, there may be a blue or red wire. Follow the manufacturer’s diagram. Double-check every connection. Loose wires cause sparks. Sparks cause fires. Step 7: Test it Turn the power back on. Turn the fan on. Listen. Does it run smoothly? Is there a loud buzz? That could mean the blades are unbalanced or the motor’s faulty. Check the airflow outside. You should feel strong suction. If not, the duct might be kinked or blocked.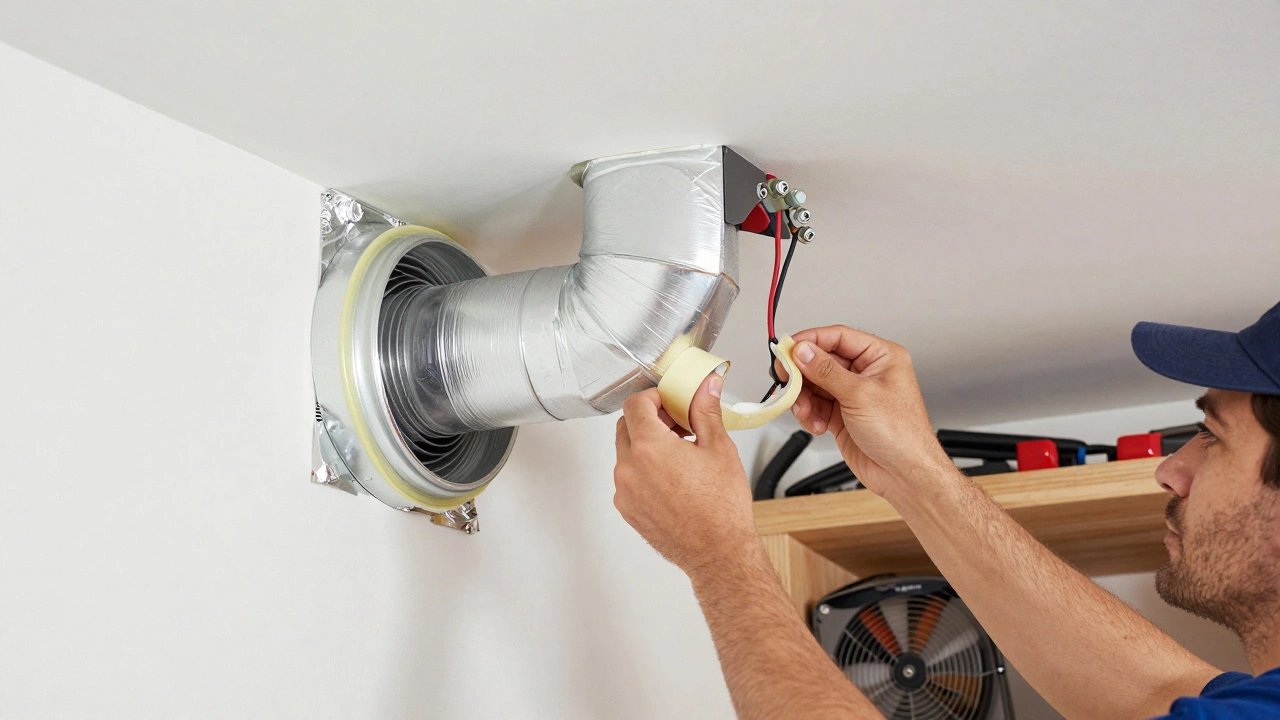
When You Shouldn’t Do It Yourself
There are times when DIY isn’t worth the risk:- You’re replacing a fan that’s wired into a 240V circuit without a dedicated switch or isolator.
- You need to run ducting through a load-bearing wall or ceiling joist without knowing how to reinforce it.
- Your home has older wiring (pre-1980s) and you’re not confident identifying live circuits.
- You’re renting. Most leases require landlord approval for permanent electrical changes.
If any of these apply, hire a licensed electrician. It’s not expensive-usually $150-$250-and you’ll get a certificate of compliance, which you’ll need if you ever sell the house.
Common Mistakes (And How to Avoid Them)
Here’s what goes wrong in 8 out of 10 DIY extractor fan installs:- Using flexible ducting: It looks easy, but it traps moisture. Use rigid aluminum instead.
- Not sealing the duct: Air leaks mean reduced efficiency. Seal every joint with foil tape.
- Installing the fan too low: If it’s mounted below the showerhead, steam won’t be caught. Mount it as close to the ceiling as possible.
- Forgetting the backdraft damper: Without one, cold air comes in when the fan’s off. Most fans come with one built in-make sure it’s not stuck.
- Ignoring building codes: In New Zealand, the Building Code (Clause G12) requires all extractor fans to vent to the outside. No exceptions.
How Long Does It Take?
If you’ve done this before, you can finish in under an hour. If it’s your first time, expect 2-3 hours. The biggest time suck is cutting the hole and running the duct. Plan for delays. Measure twice. Cut once.
What Happens If You Do It Wrong?
A poorly installed extractor fan doesn’t just fail-it causes long-term damage:- Mold: Damp walls lead to black mold, which triggers allergies and asthma.
- Rot: Wood framing and insulation can rot from trapped moisture.
- Electrical hazard: Loose wiring can overheat and cause fires.
- Warranty void: Most fan warranties require professional installation.
One homeowner in Ōtāhuhu spent $3,200 fixing water damage after installing a fan that vented into the roof space. It took two years for the damage to show up. By then, the ceiling had collapsed.
Should You Buy a Fan With a Timer or Humidity Sensor?
Yes. A basic fan runs only when you flip the switch. But if you forget to turn it off, it wastes energy. A timer fan runs for 10-30 minutes after you leave the room. A humidity sensor fan turns on automatically when moisture levels rise.Models like the Vent-Axia Lo-Carbon Humidistat or extractor fan with built-in timer are worth the extra $50-$80. They’re smarter, quieter, and more efficient. In a humid climate like Auckland, automation beats manual control every time.
Final Verdict: Can You Do It?
Yes-if you’re patient, careful, and willing to learn. You don’t need to be an electrician. But you do need to respect the electricity, the airflow, and the building structure. If you’re unsure at any point, stop. Call someone. It’s not a race. It’s your home.Installing an extractor fan yourself is one of the few home repairs that gives you immediate results. Better air. Less mold. Quieter mornings. And you’ll know you did it right.
Can I install an extractor fan without an electrician?
Yes, if you’re replacing a fan in the same location and the wiring is already set up. You’ll need to turn off the power, match the wires correctly, and ensure the fan vents to the outside. But if you’re adding a new circuit, running new wiring, or working with old or unknown electrical systems, you must hire a licensed electrician. Safety and compliance come first.
Do I need a permit to install an extractor fan in New Zealand?
No permit is required for a simple replacement in the same location. But if you’re adding a new fan, changing the duct path, or modifying the electrical system, you may need a building consent. Always check with your local council. In Auckland, the Building Act 2004 requires compliance with Clause G12 for ventilation. Even if you don’t need a permit, the work must still meet the code.
What’s the best extractor fan for a small bathroom?
For a small bathroom (under 6 m²), choose a fan with 15-20 L/s airflow. The Broan-NuTone 9093 is popular for its quiet operation and easy installation. Look for models with a humidity sensor and timer to avoid forgetting to turn it off. Brands like EnviroVent and Vent-Axia are reliable and widely available in New Zealand hardware stores.
Can I install an extractor fan in my kitchen?
Yes, but kitchens need more power. Aim for at least 30 L/s, especially if you cook frequently or use gas. Kitchen fans should be mounted above the stove or near the cooking area. Use a duct that vents directly outside-not into the roof. Avoid models designed only for bathrooms-they won’t handle grease and heat well.
Why is my extractor fan making a loud noise?
Loud noise usually means one of three things: the duct is kinked or too long, the fan isn’t mounted securely, or the blades are dirty. Check the duct for bends or sagging. Tighten the mounting screws. Clean the blades with a damp cloth and mild detergent. If the motor sounds like it’s grinding, the bearings may be worn out. In that case, replace the fan.
How often should I clean my extractor fan?
Clean the fan grille and blades every 3-6 months, especially in kitchens. Dust and grease build up quickly and reduce airflow. Turn off the power, remove the cover, and wipe down the blades with soapy water. Vacuum the duct opening if you can reach it. A clogged fan works harder, uses more power, and wears out faster.
Can I vent my extractor fan into the attic or roof space?
No. Venting into the roof cavity is against New Zealand building code and will cause serious damage over time. Moisture will condense on timber and insulation, leading to mold, rot, and structural decay. All extractor fans must vent directly to the outside-through a wall or roof. There are no exceptions.