Ever noticed that stale smell in your kitchen or bathroom, even when the window’s wide open? Odds are, your extractor fan’s craving some TLC. People brush off fan service thinking it’s only about cleaning the grille, but lurking deeper is a whole layer of dust, sticky residue, and the kind of gunk only a screwdriver can reveal. Add to that, worn bearings can make your once-silent fan sound like a wasp in a can. Yet, most fans live ignored—until humidity grows mold or grease collects near the cooking area. It’s easy to forget, since a working fan stays in the background, but a neglected one gives up right when you need it to work—during a fried fish dinner or after a steamy shower. Countless households never clean their fans, but even a cheap extractor needs a bit of regular attention to stay efficient, safe, and quiet. Stick around, and you’ll learn that with a few simple steps—and not much time—you can have air as fresh as the outdoors wafting through your space again.
Why Regular Extractor Fan Maintenance Matters
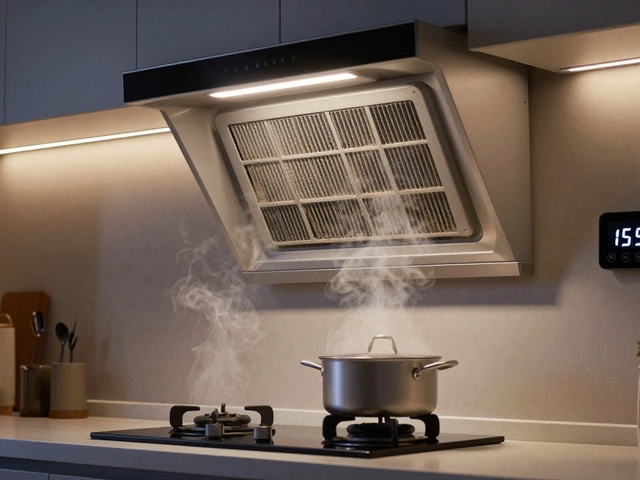
If you want your extractor fan to last, you can't just ignore it and hope for the best. Dust and grease are more than just annoying—they're performance killers. Did you know a fan covered in grime can use up to 30% more energy than a clean one? That’s like paying extra for worse results. The main job of an extractor fan is to remove unwanted moisture, smoke, and odors. But if it’s blocked by buildup, all those nasty things stay inside with you. Most fans work in either kitchens or bathrooms where moisture is high and airborne grease or dust finds its way in. Over the months, this gunk not only clings to the grille but gets into the blades and motor.
Mold is another sneaky side effect of a dirty fan. When that excess humidity lingers, it creates the perfect environment for mold. This stuff is brutal on your health—it can trigger allergies or even asthma. Besides, all that buildup can overheat and damage the motor, sometimes causing small fires especially with stuck-on kitchen grease. Insurance claims for kitchen fires from fan issues spike every year because what started as a sticky patch grew into a fire hazard. Blockages increase wear and tear. If left alone, the noise levels get worse, and you lose efficiency, with the fan no longer drawing the right volume of air. Brands like Vent-Axia and Manrose recommend cleaning every 3 to 6 months for optimal performance. Making this part of your routine can double your fan’s lifespan compared to neglected ones. Not only do you keep the air fresh, but you also save on bills and avoid unexpected breakages.
Tools and Supplies You'll Need
Before you get elbows-deep in dust bunnies and sticky buildup, make sure you've got the right stuff handy. The good news is, almost everything you need is probably lying around the house. Grab a Phillips screwdriver (usually that’s all you need to unscrew the grille), a vacuum cleaner with a soft brush attachment, a small bowl or cup for the screws, some microfiber cloths, and a mild dish soap. For really stubborn grease, get a degreaser spray that’s safe for kitchen appliances.
If you want to go pro, a small paintbrush helps get clumps out of crevices. Many people swear by compressed air cans for blowing dust out of the motor and hard-to-reach parts, but if you don’t have one, no worries—a soft brush or a clean paintbrush will do the trick. Check that you have a ladder or a sturdy step stool if your fan’s up high, and wear disposable gloves if you hate touching gunk. For bathroom fans with vents, pick up a torch or use your phone’s flashlight so you can spot buildup inside the ductwork. If the duct is flexible, a vent cleaning brush helps a ton. And always, always, cut the power at the fuse box before you start. Sounds drastic, but even fans with pull cords can be wired to stay live.
Here’s a quick table to help you sort what you need for different extractor fan types:
| Type of Fan | Suggested Tools | Extra Supplies |
|---|---|---|
| Basic Wall-Mounted (Bathroom/Kitchen) | Screwdriver, brush, microfiber cloth | Damp cloth, mild soap |
| Ducted Fans | Step ladder, torch, vacuum | Vent brush, mask if dusty |
| Ceiling-Mounted | Step stool, screwdriver | Compressed air, degreaser |
Step-by-Step: How to Clean and Service an Extractor Fan
Time to roll up your sleeves. First up: turn off the electricity at the breaker. This isn’t just good advice—it’s a must, especially if your fan’s wired into the main circuit. Accidents with live wiring are more common than people think. Once that’s sorted, grab your screwdriver and unscrew the grille. Keep the screws in a cup; trust me, they’re the first things to disappear. Gently pull off the grille and soak it in warm, soapy water. If there are stubborn greasy spots, blast them with degreaser and let it sit a minute before scrubbing. While that’s soaking, vacuum around the fan opening to pick up loose dust, then go at it with a brush.
Next, check the fan blades. Some models have a simple blade that pulls off the spindle; others won’t budge. If yours comes off, wash it in soapy water. If not, wipe it carefully with a damp cloth and a bit of dish soap. Be careful not to let water drip into the motor. Use the paintbrush for the nooks where grime builds up, especially in corners or between slats. Vacuum gently around the motor (not inside) to suck out stubborn fluff. For ceiling fans, look for any clumps inside the ductwork. You’d be surprised at how much builds up there. Shine your light and use the vent brush to sweep out the debris.
- Extractor fan models often let you get at the motor for light cleaning. If you see any thick layers there, brush or gently vacuum them away. Some fans have filters—check the manual and replace or clean as instructed.
- Check for any signs of wear or damage: frayed wiring, cracked blades, or worn bushings. If it wobbles or squeaks, now’s a good time to apply a dab of lightweight machine oil to the spindle, if the manual allows.
- Once everything’s dry and shiny, reassemble in the opposite order. Be gentle putting the grille back, and screw things back just snug; overtightening can crack brittle plastic.
- Turn the power back on and let it run. If it whirs without grinding or thumping, and airflow’s good, job done!
Most cleaning jobs take 30 minutes or less, and that extra effort repays itself right away with less noise and better air quality. Don’t forget—the big tip is to keep up with it every few months instead of waiting until the fan can barely move.
Common Problems and Simple Fixes
Even freshly cleaned fans can cause headaches. Maybe it’s still humming, rattling, or no air seems to be moving. Let’s walk through some typical problems. First, if your fan runs but doesn’t actually draw air, check the backdraft flap inside the duct. Sometimes this little panel gets stuck closed with dust or paint. A quick nudge often does the trick. If the fan barely spins, try spinning it by hand (with the power off!). If it doesn’t move smoothly, a light oiling of the spindle or bearing might help—but if it’s seized or noisy, the motor may be failing.
Banging or rattling is almost always caused by something loose. Give the grille, blades, and housing a gentle wiggle to spot anything askew. Cracked blades or broken balancing clips can also throw things off-balance. If you find worn plastic, you’re probably better off replacing the blade, which is usually cheap and easy to install. For fans that won’t turn on at all, the issue may be a blown fuse or faulty wiring. Check the wall switch and fuse first. Still not working? Time for a replacement unit, as old motors often aren’t worth fixing unless you’re handy with electronics.
Ducted fans sometimes clog with insulation or debris, especially after home renovation or storms. If air still won’t flow, check the external vent for bird nests or wasp hives—yes, really. The number of heaters and fans blocked by birds and insects is wild. Use your phone’s camera to peek into awkward spots if you can’t see clearly.
- If the fan gives out a burnt smell, it’s likely overheated or the wiring is scorched. Shut off power and call a pro. Fire risk is nothing to mess around with.
- For stubborn grease in kitchen models, a vinegar-and-baking-soda paste cuts through what dish soap can’t tackle (just don’t overdo it on plastic parts).
- If you notice a drop in suction but the motor sounds fine, inspect for blockages in both the intake and exhaust ducts. Sometimes, lint or pet fur packs into unseen corners.
A handy tip: fans installed with a short duct run are easier to keep clear. Anything with long twists or runs through loft spaces may need professional duct clearing every couple of years. Envelope yourself in that peace of mind, knowing you’re breathing cleaner and dodging surprise repairs.

Expert Tips for Ongoing Efficiency and Air Quality
Fans aren’t set-and-forget appliances, but you can keep them in fighting form with a little consistent effort. The secret: don’t wait for signs of trouble. Mark your calendar to service kitchen fans every three months and bathroom units at least twice a year. If you cook a lot (think sizzling bacon every weekend), once a month might be ideal. Place a sticky note near the light switch as a reminder if you’re forgetful.
If your home is prone to dust or you have pets that shed, throw a cheap mesh filter over the fan’s grille (cut to fit)—this catches hair and fluff, which you can clean or swap regularly. For fans that struggle with heavy condensation, try running them for an extra 10 or 15 minutes after cooking or showering. That gets more moisture out before it settles. Some modern fans come with humidity sensors that kick them on automatically at a certain level—consider upgrading if you live in a damp environment.
- Always use the highest recirculation setting for kitchen fans when frying or roasting.
- Keep the area clear around bathroom fans; dusty towels or products can block airflow.
- If you notice weird noises, don’t ignore them—minor squeaks can turn into major headaches.
- Fan not restoring performance after a deep clean? Look for split ducting, corroded connections, or blockages at the roof or wall exit.
Try this trick: while the fan’s running, hold a piece of toilet paper near the grille. It should stick due to the suction. If it doesn’t, you’ve got a blockage somewhere. And, if your fan’s under warranty, stick to the brand’s servicing schedule—sometimes they’ll cover repairs if you have records.
Clean, working extractor fans mean lower humidity, less mold, and fresher air. Treat your fan with respect and attention, and it’ll reward you with trouble-free performance and a quieter home. Next time you catch a whiff of something stale, you’ll know exactly where to look first.