If your kitchen’s heart is humming but the food stays warm, you’re probably dealing with a refrigerator not cooling. It’s a frustrating problem that can spoil groceries and spike your electricity bill. The good news? Most cooling failures have a clear cause and a DIY fix you can try before you call a technician.
What Makes a Refrigerator Keep Things Cold?
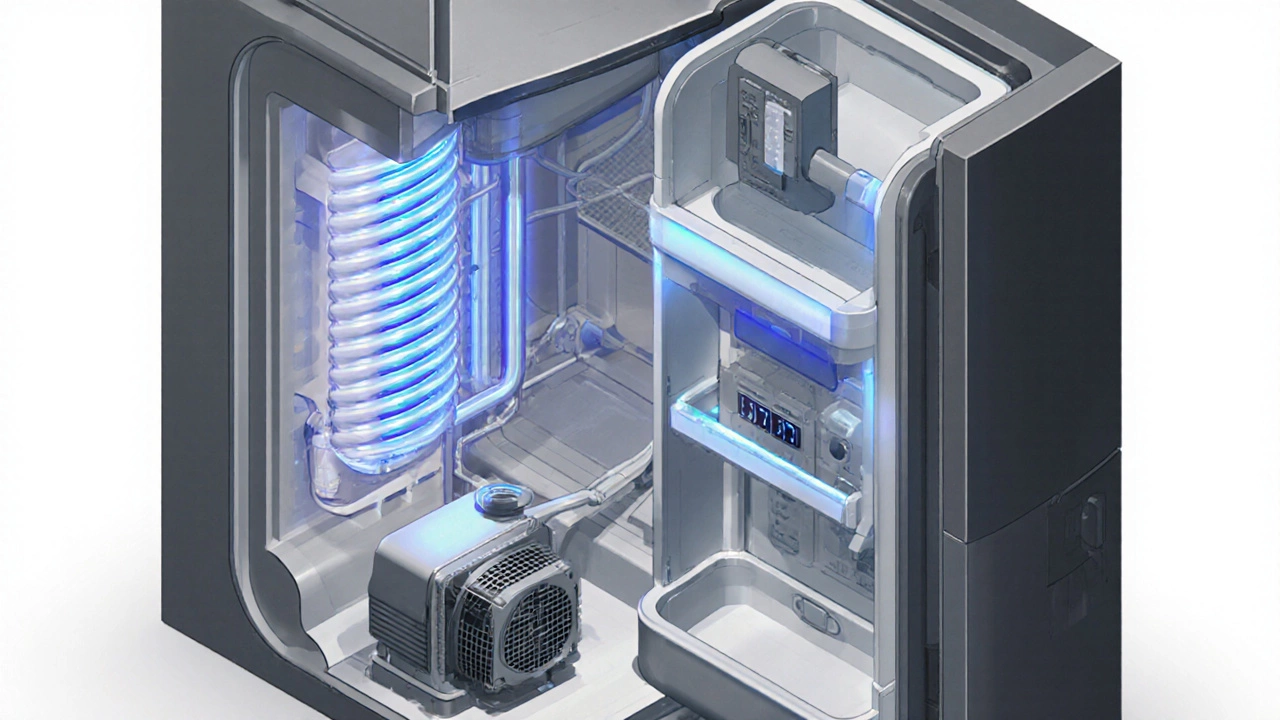
Understanding the cooling loop helps you spot where things go wrong. A modern refrigerator relies on a handful of key components that work together in a closed‑loop system:
- Compressor the pump that pressurizes refrigerant gas, turning it into a hot, high‑pressure vapor
- Condenser coils where the hot vapor releases heat to the surrounding air and condenses into a liquid
- Expansion valve (or capillary tube) restricts the liquid, causing it to evaporate rapidly and cool
- Evaporator coil the cold coil inside the fridge where refrigerant absorbs heat from the interior
- Thermostat senses interior temperature and tells the compressor when to run
- Door seal (gasket) prevents warm air from entering the compartment
- Defrost timer automates the melt‑cycle to stop ice buildup on the evaporator
When any of these parts fail, the cooling loop breaks and the fridge stops doing its job.
Common Reasons Your Refrigerator Stops Cooling
Below are the most frequent culprits. Knowing them narrows down the troubleshooting path.
- Dirty or blocked condenser coils - Dust, pet hair, or debris act as insulation, preventing heat from escaping.
- Faulty thermostat or temperature control board - The fridge thinks it’s already cold and never signals the compressor.
- Bad door seal - Cracks or shrinkage let warm air leak in, overworking the cooling system.
- Malfunctioning compressor - If the compressor won’t start, the refrigerant never circulates.
- Low refrigerant charge - Leaks reduce the amount of cooling fluid, resulting in warm compartments.
- Ice buildup on the evaporator coil - Excess frost blocks air flow, a problem often caused by a failed defrost timer.
- Power supply issues - A tripped breaker or loose plug can cut power to the cooling components.
Step‑by‑Step Diagnosis Checklist
Grab a notepad and work through these steps. Most homeowners can finish the entire list in under an hour.
- **Check the power** - Confirm the unit is plugged in, the outlet works, and the breaker isn’t tripped.
- **Listen for the compressor** - You should hear a low humming or clicking when it runs. No sound? The compressor may be dead or the start relay faulty.
- **Feel the condenser coils** - Locate them (usually behind or underneath). If they’re hot to the touch, they’re likely clogged.
- **Inspect the door seal** - Close a dollar bill against the gasket; if it slides out easily, the seal is compromised.
- **Look for frost on the evaporator** - Open the freezer; heavy ice indicates a defrost problem.
- **Check the thermostat setting** - Make sure it’s set to a reasonable temperature (≈37 °F / 3 °C for fridge, 0 °F / ‑18 °C for freezer).
- **Smell for refrigerant leaks** - A sweet, oily odor may signal a leak. If you suspect this, stop DIY work and call a pro.
How to Fix Each Issue
Below each symptom, you’ll find a practical fix you can do with common tools.
1. Clean Dirty Condenser Coils
Unplug the fridge. Use a vacuum with a brush attachment or a coil‑cleaning brush to gently remove dust. Rinse the coils with a garden hose (low pressure) if they’re very grimy, then let them dry for 30 minutes before plugging the unit back in. A clean coil can improve cooling efficiency by up to 30 %.
2. Replace a Faulty Thermostat or Control Board
Thermostats are inexpensive (often under $20). Locate it-usually behind the interior panel. Use a multimeter set to “ohms” to test continuity; a broken sensor shows infinite resistance. Swap it with the new part, reconnect power, and watch the compressor kick in after a few minutes.
3. Repair or Replace the Door Seal
If the gasket is warped, warm it with a hair dryer for 20 seconds, then press it back into place. For cracked seals, purchase a replacement gasket specific to your model (check the model number on the interior wall). Install it by sliding the new seal into the groove and sealing it with a thin bead of silicone.
4. Address Compressor Issues
First, test the start relay (a small plastic box attached to the compressor). Pull it out and shake it; rattling indicates a bad relay-replace it. If the relay is fine, the compressor itself may have seized. Unfortunately, a dead compressor usually requires a professional replacement.
5. Re‑charge Refrigerant (Leak Repair)
Only certified technicians should handle refrigerant. However, you can locate the leak source: look for oily spots on the copper tubing. Once identified, a pro can evacuate the system, repair the leak, and recharge it to the manufacturer’s pressure specifications (usually measured in psi).
6. Defrost the Evaporator Coil
Unplug the fridge, remove food, and leave the doors open. Let the ice melt naturally or speed it up with a hair dryer on low heat. After the coil is clear, locate the defrost timer (often behind the control panel) and manually advance it using a screwdriver to see if the heater engages. If the timer fails to advance, replace it.
7. Fix Power Supply Problems
Test the outlet with a lamp or a voltage tester. If the outlet is faulty, replace it or reset the GFCI. Check the power cord for frayed wires; replace the cord if needed.
Preventive Maintenance Tips
Keeping your fridge in top shape reduces the chances of cooling loss.
- **Clean the condenser coils** every 6 months.
- **Wipe the interior** weekly to prevent food buildup that can block airflow.
- **Check door seals** quarterly; a small crack can turn into a big energy drain.
- **Leave space** around the fridge-at least 2 inches on the sides and back-to allow proper ventilation.
- **Avoid over‑loading**; packed shelves restrict air circulation over the evaporator.
When to Call a Professional
Some fixes are beyond a DIY toolbox. Schedule a technician if you encounter any of the following:
- The compressor hums but never starts.
- You smell refrigerant or suspect a leak.
- Electrical components like the control board are burnt or water‑damaged.
- Repeated attempts to fix the same issue haven’t worked.
Professional repair saves time and ensures the refrigerant handling complies with local regulations (important in New Zealand).
Quick Reference Table
| Symptom | Probable Cause | DIY Fix |
|---|---|---|
| Warm interior, compressor silent | Power supply issue or tripped breaker | Reset breaker, test outlet |
| Frost buildup in freezer | Defrost timer or heater failure | Manual defrost, replace timer |
| Humming noise, no cooling | Start relay or compressor problem | Swap relay; if no change, call pro |
| Warm spots near door | Damaged door gasket | Repair seal or install new gasket |
| Unit runs constantly, still warm | Dirty condenser coils | Clean coils, ensure ventilation |
Bottom Line
Most refrigerator cooling failures stem from a handful of predictable problems-dirty coils, a bad seal, or a misbehaving thermostat. By following the checklist above, you can diagnose and often fix the issue yourself, saving money and keeping your food safe. Keep up with the preventive steps, and you’ll enjoy a chill, efficient fridge for years to come.
Why is my fridge loud but not getting cold?
A noisy fridge usually means the compressor is running, but if the interior stays warm, the condenser coils are probably clogged or the refrigerant has leaked. Clean the coils first; if that doesn’t help, check for a refrigerant leak and call a professional.
How often should I clean my refrigerator’s condenser coils?
Aim for every six months. In dusty homes or if you have pets that shed, a quarterly cleaning prevents the coils from acting like insulation and keeps the unit efficient.
Can I replace the thermostat myself?
Yes, most thermostats are simple snap‑in devices behind an interior panel. Disconnect power, note the wiring, pull the old unit, and swap in the new one. Test with a multimeter if you’re unsure.
My fridge is still warm after cleaning the coils-what next?
Look at the door seals for leaks, verify the thermostat setting, and listen for the compressor. If the compressor isn’t humming, the start relay or the compressor itself may be faulty, which usually needs a technician.
Is it safe to use a hair dryer to melt ice on the evaporator coil?
Yes, as long as you keep the dryer on low heat and avoid directing hot air at plastic components. Wear gloves, unplug the fridge, and never use an open flame.