

Water Heater Diagnostic Tool
Step 1: Identify Your Symptoms
Select all the issues you are currently experiencing with your water heater.
Step 2: Multimeter Readings
If you have tested the element with a multimeter, enter the resistance reading (Ohms/Ω). If not, select "Not Tested".
Step 3: Diagnosis
Step 4: Recommended Actions
There is nothing quite as frustrating as stepping into a shower expecting warmth and getting hit with ice-cold water. It happens on the coldest mornings of the year, usually right before you have to leave for work. While there are many reasons your electric water heater might stop producing heat, a faulty heating element is one of the most common culprits. Before you call a technician or buy a new unit, it helps to know exactly what to look for.
A bad heating element doesn't always announce itself with a dramatic explosion or a total system shutdown. Often, the symptoms are subtle-a lukewarm shower that lasts only ten minutes, or strange noises coming from the tank. By learning how to identify these signs and perform a simple continuity test, you can save yourself hundreds of dollars in service calls. This guide walks you through the physical symptoms, the electrical testing process, and the safety steps required to diagnose the problem accurately.
The Early Warning Signs of a Failing Element
You don’t need a multimeter to suspect an issue; your senses often pick up on problems long before the component completely fails. The first and most obvious sign is inconsistent water temperature. If your hot water runs out faster than usual, or if the water never gets fully hot, the upper or lower heating element may be struggling. In dual-element systems, if the top element works but the bottom one fails, you might get a small amount of hot water (from the top tank section) followed immediately by cold water. This is because the bottom element is responsible for heating the majority of the tank’s volume.
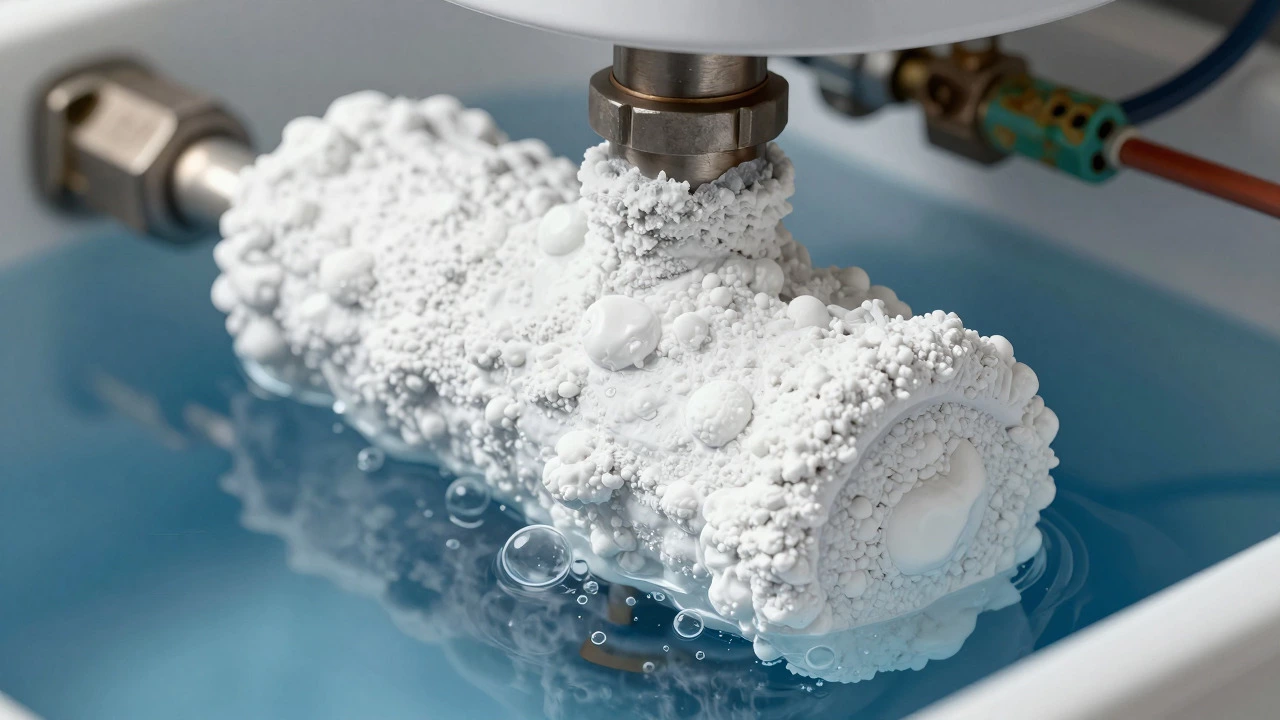
Noise is another major indicator. A healthy water heater operates quietly. When a heating element begins to fail, mineral deposits-often called scale-build up on its surface. As the element heats this layer of sediment, it expands and contracts rapidly, creating popping, rumbling, or cracking sounds. Think of it like putting a dry pan on high heat; the sound comes from the trapped steam escaping under the crust. If your unit sounds like a bag of popcorn is exploding inside the walls, the elements are likely coated in lime or calcium, which insulates them and causes premature burnout.
Additionally, check your electricity bill. A failing element often draws more current as it struggles to reach the set temperature due to resistance from mineral buildup. If your energy costs have spiked without a change in usage habits, your water heater might be working inefficiently. Finally, look for leaks around the access panels on the side of the tank. While a leak usually indicates a seal failure, persistent moisture near the element terminals can corrode the connections, leading to intermittent heating issues.
Safety First: Preparing for Inspection
Before touching any wires or removing panels, you must eliminate the risk of electrocution. Water and electricity are a deadly combination, and even a residual charge can cause serious injury. Start by turning off the circuit breaker dedicated to your water heater. Do not rely solely on the thermostat switch located on the side of the unit; go to your main electrical panel and flip the breaker to the "Off" position. To be absolutely sure, use a non-contact voltage tester on the wires behind the access panel. If the tester does not beep or light up, the power is truly cut.
Next, shut off the cold water supply valve located at the top of the heater. Open a hot water faucet somewhere in your house (like a sink in the laundry room) to relieve pressure and drain some water from the tank. You don’t need to drain the entire tank unless you are replacing the element, but lowering the water level below the element you intend to test prevents water from spraying out when you remove the terminal cover. Wear rubber-soled shoes and keep the area around the heater dry. These precautions are non-negotiable when dealing with high-voltage appliances.
Visual Inspection: What to Look For
Once the power is off and the water level is managed, remove the access panels on the side of the water heater. You will see two sets of wiring connected to the thermostats and elements-one for the upper element and one for the lower. Carefully peel back the insulation material covering these components. Look closely at the wiring connections. Are they loose? Is there visible corrosion, such as green or white crusty residue, on the metal terminals? Corrosion increases electrical resistance, which can prevent the element from receiving full power, causing it to underperform or fail entirely.
Examine the element itself if possible. While still attached, look for signs of burning or discoloration on the surrounding area. If the plastic terminal cover is melted or cracked, it suggests the element has been overheating. Overheating often occurs when the thermostat fails to cut power, causing the element to run continuously until it burns out. Also, check for sediment buildup on the element fins. Heavy scaling looks like a thick, chalky white layer. If the element is heavily scaled, it may test fine electrically but still fail to transfer heat efficiently to the water, mimicking a dead element.
Testing Continuity with a Multimeter
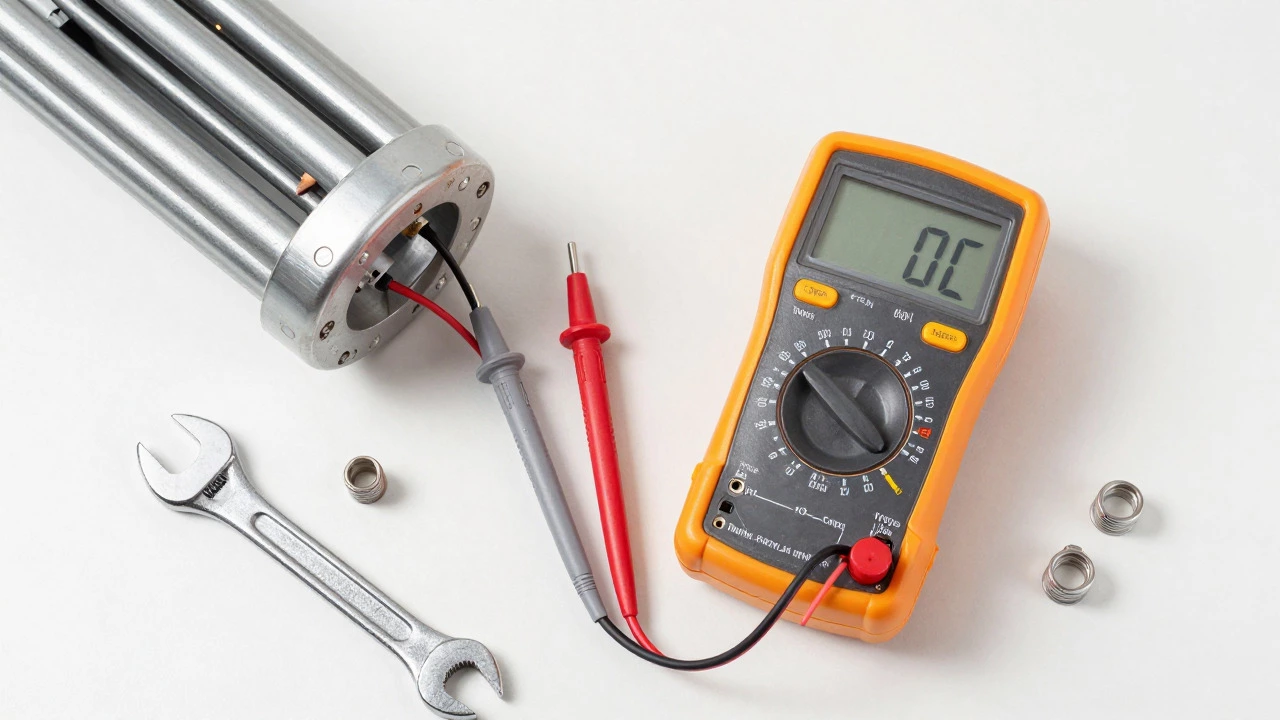
Visual inspection gives clues, but a multimeter provides proof. To test the heating element, you need to measure its electrical resistance. Set your digital multimeter to the ohms (Ω) setting, typically the lowest range like 200Ω. Remove the wire nuts connecting the wires to the element terminals. Be careful not to let the bare ends of the wires touch each other or the metal tank, as this could cause a short circuit if power were accidentally restored.
Touch one probe of the multimeter to one terminal of the heating element and the other probe to the second terminal. A good heating element should show a resistance reading between 10 and 16 ohms, depending on the wattage (usually 4500 watts for residential units). If the multimeter reads "OL" (Open Loop) or infinity, the internal coil is broken, and the element is dead. If the reading is significantly higher than 16 ohms, the element is degraded and will not heat effectively. Conversely, if the reading is close to zero, there is a short circuit within the element, which would trip your breaker immediately upon startup.
It is also wise to test the ground. Touch one probe to an element terminal and the other probe to the metal casing of the water heater. The meter should read "OL" or infinity. If it shows any continuity (a number), the element is grounded, meaning electricity is leaking to the tank. This is a serious safety hazard and requires immediate replacement of both the element and potentially the dip tube seals.
Don't Forget the Thermostat and High-Limit Switch
A common mistake homeowners make is replacing the heating element when the real problem lies elsewhere. The heating element is controlled by a thermostat. If the thermostat is stuck in the "off" position or has failed internally, it won't send power to the element, making the element appear dead during testing. Always test the thermostat for continuity as well. Additionally, modern water heaters have a high-limit reset button (usually red) on the thermostat. If this button has popped, it means the water got dangerously hot, often due to a stuck thermostat or a faulty thermocouple. Pressing the reset button might restore function temporarily, but if it pops again, the underlying control issue remains.
In dual-element systems, the lower thermostat only receives power when the upper thermostat is satisfied. If the upper thermostat is broken, the lower element will never turn on, regardless of its condition. Therefore, diagnosing a "bad element" often involves checking the entire control chain: breaker → upper thermostat → upper element → lower thermostat → lower element. Skipping this step leads to unnecessary parts purchases and repeated repair attempts.
| Symptom | Likely Cause | Action Required |
|---|---|---|
| No hot water at all | Upper element failure or tripped breaker | Test upper element and thermostat |
| Lukewarm water only | Lower element failure or heavy scaling | Test lower element; flush tank if scaled |
| Popping/Rumbling noises | Mineral buildup on elements | Flush tank; inspect elements for scale |
| Breaker trips frequently | Shorted element or grounded wire | Test for ground fault; replace element |
| Hot water runs out quickly | Blown dip tube or lower element failure | Check dip tube integrity; test lower element |
When to Replace vs. When to Call a Pro
If your tests confirm a bad element, replacement is relatively straightforward for someone with basic DIY skills. You will need a new element matching the wattage and voltage (usually 240V, 4500W), a wrench, and dielectric unions or Teflon tape to ensure a watertight seal. However, if the tank is older than ten years, consider whether repairing it is worth the investment. An aging tank is prone to corrosion and eventual leakage. Replacing the element might extend its life by a few months, but investing in a new, energy-efficient model could save money in the long run.
Call a professional if you are uncomfortable working with electricity, if the tank is leaking, or if the issue persists after replacing the element. Persistent problems often point to deeper issues like a cracked tank lining, a faulty pressure relief valve, or complex wiring faults that require specialized diagnostic tools. Professional technicians also carry insurance, protecting you from liability if something goes wrong during the repair.
Maintenance Tips to Extend Element Life
Prevention is cheaper than repair. The primary enemy of heating elements is hard water. In areas with high mineral content, flush your water heater annually to remove sediment. This keeps the elements clean and allows them to transfer heat efficiently. Install a whole-house water softener if your local water hardness exceeds 7 grains per gallon. Additionally, check the anode rod every three to five years. The anode rod sacrifices itself to protect the tank from rust; if it is depleted, the tank-and eventually the elements-will corrode faster. Regular maintenance ensures your water heater performs reliably for its full lifespan, typically 8 to 12 years.
How much does it cost to replace a water heater element?
The part itself typically costs between $20 and $50. If you hire a plumber, labor charges can add $100 to $200, bringing the total to approximately $150 to $250. Doing it yourself saves significant money but requires comfort with electrical safety protocols.
Can I test the element without removing it from the tank?
Yes, you can test for continuity while the element is still installed. Simply disconnect the wires from the terminals and place the multimeter probes on the screw terminals. Ensure the power is off before doing this to avoid damaging the meter or shocking yourself.
Why does my water heater make popping noises?
Popping noises are caused by mineral sediment buildup at the bottom of the tank. As the lower element heats the water, steam bubbles form under the sediment layer and escape rapidly, creating loud pops. Flushing the tank removes this sediment and reduces noise.
What is the difference between upper and lower heating elements?
In most electric water heaters, the upper element heats the top portion of the tank first. Once that water reaches the set temperature, the lower element activates to heat the rest of the tank. The upper element is used for recovery (reheating after heavy use), while the lower element maintains the bulk temperature.
Should I replace both elements at the same time?
Not necessarily. Only replace the element that has failed the continuity test. However, if both elements are old and heavily scaled, replacing both simultaneously might be more efficient since you are already draining the tank and accessing the components.