Water Heater Maintenance Predictor
Quick Takeaways for Tank Longevity
- Inspect your rod every 3 to 5 years.
- Replace it immediately if the core wire is exposed or the rod is pitted.
- Hard water environments require more frequent checks (every 2 years).
- A fresh rod can add years to your heater's lifespan by preventing rust.
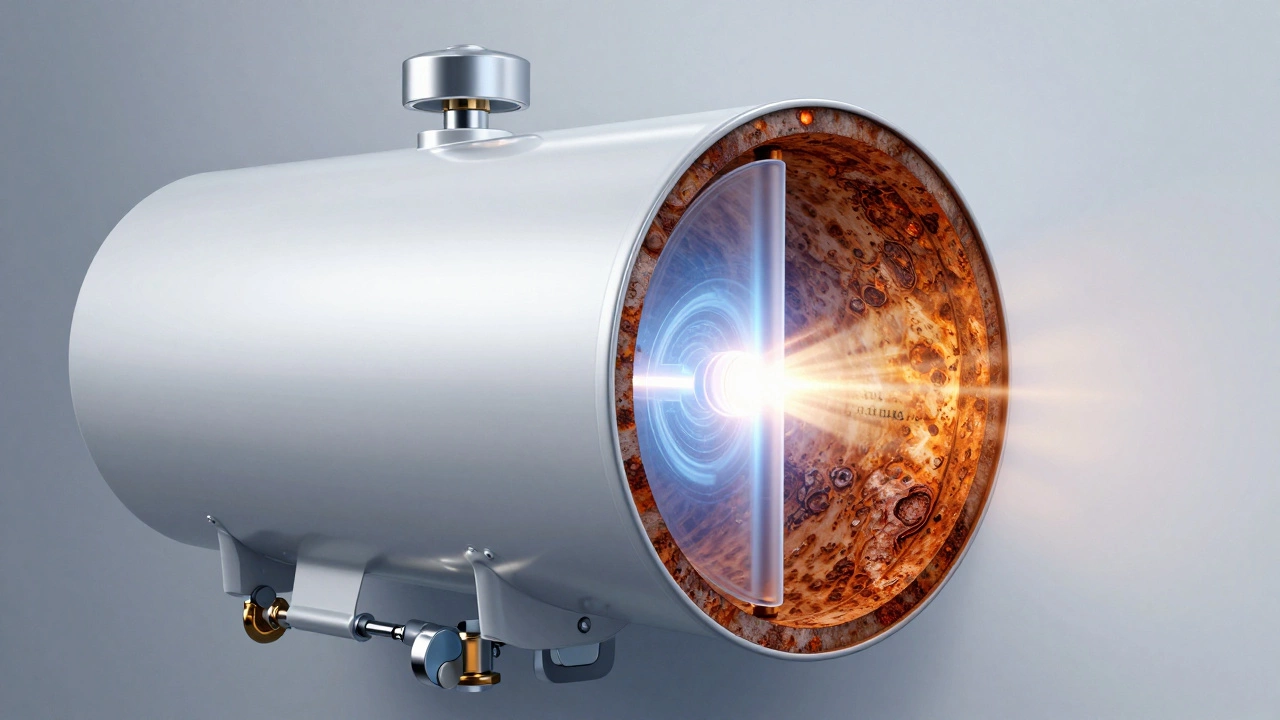
What Exactly Is an Anode Rod?
Think of an Anode Rod is a sacrificial metal rod inserted into the top of a water heater tank to protect the steel shell from corrosion. It's essentially a bodyguard for your tank. Because of a process called electrolysis, the corrosive elements in your water will attack the more "active" metal first. By giving the water a piece of magnesium or aluminum to chew on, the tank's steel walls stay intact.
When the Anode Rod finally dissolves completely, the water stops eating the rod and starts eating your tank. Once the tank walls rust through, you can't just patch it with a weld; you have to buy a whole new water heater. That's why anode rod replacement is the single most cost-effective piece of maintenance you can do for your home.
The Magic Timeline: How Often Should You Replace It?
There isn't a one-size-fits-all date on the calendar, but a general rule of thumb is to check the rod every 3 years. For most homes, a full replacement happens every 3 to 5 years. However, your local water chemistry changes this timeline significantly.
If you live in an area with Hard Water-water with high concentrations of calcium and magnesium-the rod works overtime. In these cases, you might find the rod is completely gone in just 2 years. On the flip side, if you have a sophisticated Water Softener installed, the rod may last a bit longer because the softener removes some of the minerals that accelerate the corrosion process.
| Water Type | Inspection Interval | Typical Replacement | Risk Level |
|---|---|---|---|
| Soft/Filtered Water | Every 5 years | 5-7 years | Low |
| Average City Water | Every 3 years | 3-5 years | Moderate |
| Hard/Well Water | Every 2 years | 2-3 years | High |
Signs Your Rod Is Finished
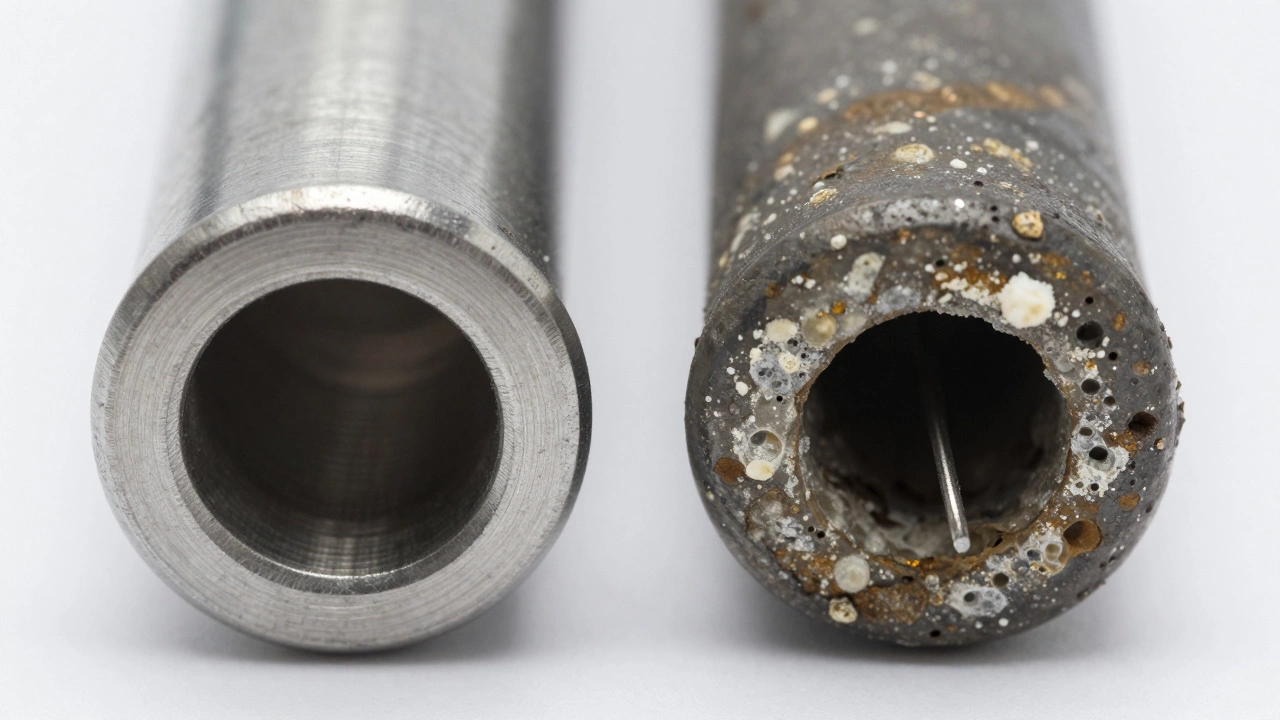
You can't see the rod from the outside, so you have to go fishing for it. To check the rod, you'll need a 1-1/16 inch socket wrench. Once you unscrew it and pull it out, look for these red flags:
- The Core Wire is Visible: Most rods have a steel wire running through the center. If the outer metal is gone and you just see a thin wire, the rod is dead.
- Heavy Pitting: If the rod looks like a piece of Swiss cheese or has deep craters, it's nearing the end of its life.
- Scaling: If the rod is covered in thick, white, crusty deposits (calcium), it can't protect the tank effectively.
- Smelly Water: Ever noticed your hot water smells like rotten eggs? This usually happens when the Magnesium Anode reacts with sulfate-reducing bacteria. While the rod is still "working," it's a sign that the chemical balance is off and it's time for a change.
Choosing Your Weapon: Magnesium vs. Aluminum vs. Zinc
When you go to the hardware store, you'll see a few different options. Choosing the wrong one can actually make your water smell worse or fail to protect your tank in specific conditions.
Magnesium Anode Rods are the standard for most residential heaters. They are highly active and provide great protection, but they are the most likely to cause that "sulfur smell" in certain water types.
Aluminum Anode Rods are often found in newer heaters. They last longer than magnesium and don't cause the sulfur smell, but they aren't as effective in very soft water.
For those with really stubborn water issues, Zinc Anode Rods (or powered anodes) are the pro choice. Zinc is often used as a coating over aluminum or steel. Powered anode rods use an external electrical current to provide protection without the rod ever physically dissolving, meaning you never have to replace them again.
Step-by-Step Replacement Process
Replacing a rod is a dirty job, but it's straightforward. You don't need to be a master plumber, but you do need to be careful with your seals.
- Power Down: Turn off the electricity at the breaker or turn the gas valve to "Pilot." You don't want the heating elements firing while the tank is open.
- Drain Slightly: You don't need to empty the whole tank, but drain a few gallons from the bottom valve to reduce pressure and prevent water from spraying out the top.
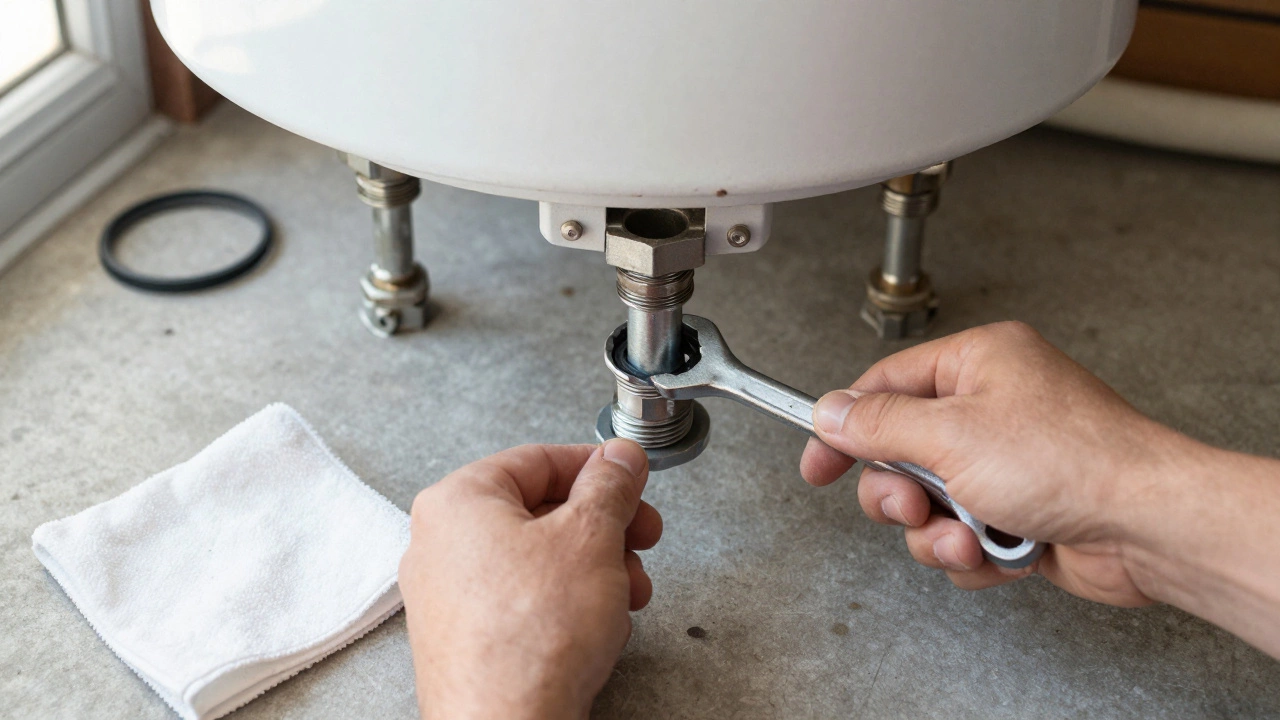
- Unscrew the Old Rod: Use your socket wrench to loosen the hex head on top of the tank. Be ready-as you unscrew it, water will seep out.
- The Pull: Carefully pull the rod straight up. If it's stuck, give it a slight twist.
- Clean the Threads: Use a rag to wipe away any sediment or rust from the threads where the rod screws in.
- Insert the New Rod: Thread the new rod in by hand first to avoid cross-threading. Tighten it with the wrench, but don't over-torque it or you'll crush the washer.
- Refill and Test: Turn the water back on, let the tank fill completely (open a hot water tap until the air stops bubbling), and then restore power.
Common Mistakes to Avoid
I've seen plenty of homeowners try to save time by skipping steps, only to end up with a leak. First, never forget to check the gasket. If you reuse the old, flattened washer, you'll almost certainly get a slow drip that ruins your ceiling if the heater is in an attic.
Second, don't ignore the "sediment sludge." When you pull the rod out, you might see a bunch of sandy grit. This is Sediment Build-up. If there's more than an inch of gunk at the bottom, replacing the rod isn't enough-you need to perform a full tank flush to remove the minerals that insulate the bottom of the tank and cause the burner to overheat.
Lastly, don't buy the cheapest generic rod you find online. A rod that isn't the correct length or doesn't have the proper metallurgical composition won't protect the tank. Stick to OEM (Original Equipment Manufacturer) parts or highly rated industry standards.
Can I just leave the anode rod alone?
You can, but you're gambling. Once the rod is gone, the water will start corroding the interior steel walls of your tank. This leads to pinhole leaks that cannot be repaired. Replacing a $30 rod every few years is much cheaper than replacing a $1,200 water heater every 6 years.
Will a new anode rod fix the rotten egg smell?
Often, yes. If you have a magnesium rod and your water smells like sulfur, switching to an aluminum or zinc anode usually eliminates the odor because those metals don't react with sulfate bacteria in the same way.
How do I know if my water is "hard"?
Look for white, chalky buildup on your faucets and showerheads. If your soap doesn't lather easily or you see spots on your glasses after washing them, you likely have hard water, which means you should check your anode rod every 2 years.
Do tankless water heaters have anode rods?
Generally, no. Since tankless heaters don't store large amounts of water in a big steel vat, they don't need a sacrificial anode. However, they require "descaling" or flushing with vinegar to remove mineral buildup from the heat exchanger.
What happens if I put in the wrong type of rod?
If you put a magnesium rod in water that is already prone to sulfur smells, the smell will get worse. If you use a rod that is too short, the bottom of your tank remains unprotected and will rust. Always match the rod length to your tank's specifications.
What To Do Next
If you've never checked your rod, now is the time. Grab a socket wrench and spend ten minutes inspecting it. If the rod looks okay, mark your calendar for three years from today. If it's gone, grab a replacement and a fresh gasket. If you find a mountain of sediment at the bottom of the tank while you're at it, consider scheduling a professional flush to ensure your heating elements aren't burning out prematurely.


